Showing posts with label paper crafts. Show all posts

Thursday, March 5, 2015

I LOVE to recycle old pieces!!

Happy Thursday peoples!! Ohhhh, it's going to be a rather blustery and wet day here today. The leaves and bare branches are just a dancin up a storm. Bahahaha....get it.....dancing up a STORM. OK, ok, I do believe I've had my quota of coffee for the day. yes?

My last post was about the Holiday tree at work and I wanted to show ya'll the pics of all my decorations after I put them all up.


The customers are really enjoying the tree being changed up it seems as some of our regulars are giving me suggestions and ideas for future trees. Job security, eh? HEHEHE

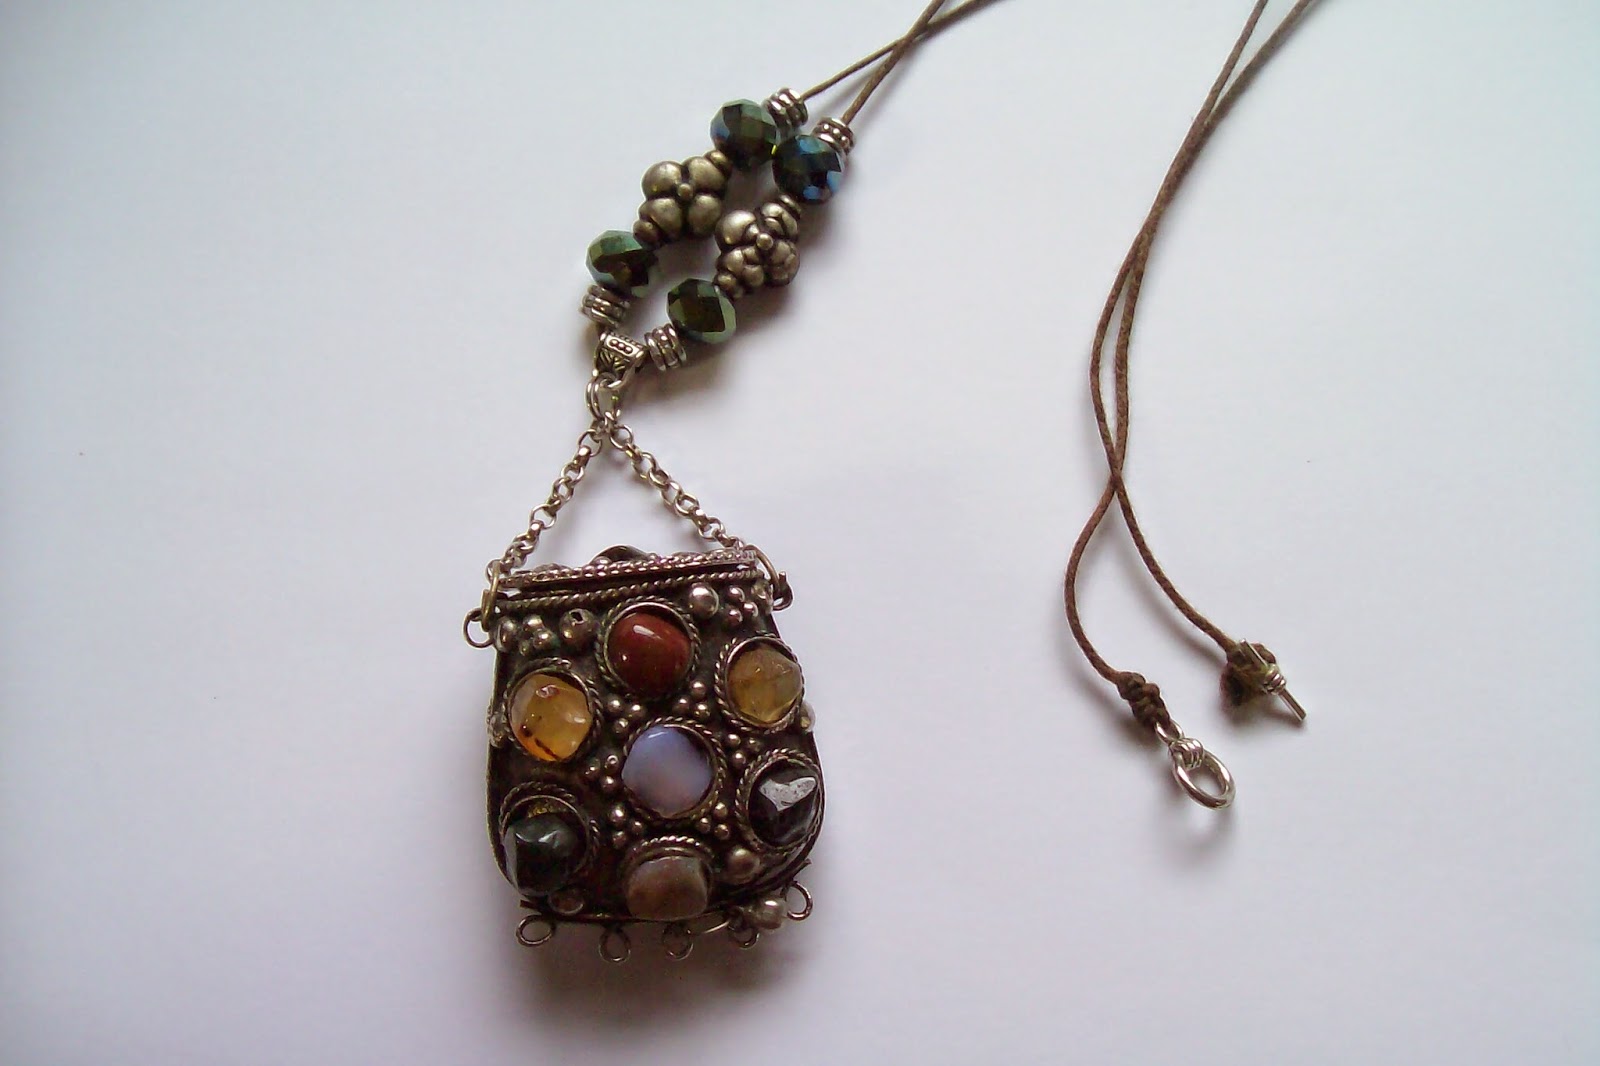
Now, let's talk about what I meant with my title of  "I LOVE to recycle old pieces". One of my favorite things to do on a rainy Saturday is to wander through some of the local flea and antique markets. I'm one that will rummage through all the old jewelry pieces. I really love it when I find broken pieces and just because it's broken doesn't mean it can't be taken apart and turned into something completely new and beautiful. I have discovered a few pieces in the past and since I'm working again I needed something to make my (small) wardrobe go further and by making jewelry pieces, I can change the look up. Here's a few pieces I've made so far.


All of these pieces were taken from old broken jewelry pieces. Ya would have never known if I hadn't told ya, ri iight?? See what YOU could do too? It's fun browsing, hunting and finding and then really exciting when you sit down and SEE just what your new piece could be. Try it.....you'll like it!!!

Until next time..............get UP and do something,
Regi

Monday, March 2, 2015

Don't be SHOCKED now peoples!!!

WHAT?? Regi is posting two days in a row? Bahahaha  I am, I am. This however won't be a long post as I had an unwelcomed visitor appear last night and I can't get him to leave. I bet ya know him but I'm praying that he hasn't (and won't) make an appearance at your house. That nasty stomach bug!! BLAHHHH!!!

I wanted to show ya'll the rest of the decorations I made for the Holiday tree at work. I'm hoping it will get as many compliments as the Mardi Gras tree did this past month. As soon as this nasty visitor goes away and I get in to work and get everything on the tree, I will take a pic and share it all put together.


Here's the wreath I made to match the banner I posted about yesterday. Did YOU make one?


HEHEHE....here's the mess I made making the wreath. Looks like there was a faerie glitter war, yes?
You should have seen me and Piwacket. We will be brushing off glitter, sneezing it and letting it fly from our hair/fur for days. 


Now I don't have a big budget to purchase supplies to make my ornies and decorations so I always go looking at the Dollar Tree first. I can always find something there. Clothes pins...remember those? They look really cute painted green and with some added glitter (yes yes I played in glitter all day peoples. I mean I had enough on the floor to scoop up and make several different projects. hehe) I glued some gift wrap curly ribbon to them and will clip them on a branch as an ornament. I'm thinking these can be used for Easter decorations as well. 


Close up of clothes pin and curly ribbon!!!


Another Dollar tree find. You get 12 in a package. 6 glitter ones and 6 plain ones. I simply punched holes on each side of stem and ran twine through them and POOF.....instant tree garland.


A famous saying every St Patty's day is "KISS ME, I'M IRISH" so I just had to do a few ornies to hang on the tree. I really have fallen in love with the heart shamrocks.


Last but not least are some of my chenille ornies. I love making these and if anyone is interested just let me know and I will do a "How To" on making some. The colors are brighter than shown here in the vintage print I used. Cheers...Cheers for St Patrick's Day!!!

Until next time..........get up and do something!!!

Regi

Sunday, March 1, 2015

WHOA....it's WHAT month already?

Peoples.....can ya believe it's March already? Where is all the time going to? I feel as though I'm in a time warp of some kind because I know it surely can't really be March already. ^_^

Well, actually I do know that today is March 1st because I'm working on the ornaments and goodies that will be going up at the grill tomorrow. If you haven't been visiting in a while or this is your first visit under the old Southern ooak tree then you probably don't know what the grill is, do you? It's a Funky, junky Redneck dive that I'm working at. BAHAHAHA!!! It's where all the locals go to eat and I can tell ya from experience that the food is AWESOME. The name of the grill I'm working at is called Fish River Grill #2 located here in Foley. There is also a Fish River Grill #1 which is located in Fairhope ( that's called the Funky, junky Dive) and one located in Gulf Shores that is Fish River Grill #3 (the Funky, junky Hifalutin joint). If you're ever in the area come and visit and enjoy some true Southern hospitality and cooking!! Now, back on track to what I'm making and why. HEY...ya'll know I get very easily distracted. We have a Holiday tree at #2 and I get to decorate it....YEA me!!! January we left it as the Christmas tree (it should always be Christmas, at least in peoples actions and thoughts) and last month is was of course turned into a Mardi Gras tree. This month it's going to be a St. Patrick's day tree.

The first item I'm making is a cute paper banner that I plan on hanging on the front side of the register counter. I love playing with paper. It's something that most of us have on hand and you can do so much with it. I thought perhaps YOU might like to make one of the banners too....so come and follow along.


Supplies Needed:


Pencil
Ruler
Scissors
Cardstock (White and tan)
Pretty paper or stamps and ink
Vintage image map of Ireland
Vintage image of sheet music
Twine
Brads-small
Glue (I used Elmer's school glue stick)
Hole punch
Thick doll needle or dentist scraping tool
Green glitter (I use glitter fast dry fingernail polish)


First thing is to decide how you want your banner to look. I love scoping out "How To" post from other bloggers and found this one that gave me the inspiration to make my own banner. The blog is called Lil Luna (all things good) and if you would like to see her post, where I found my inspiration, just click HERE


I like the pointed flag look so that's what I'm using. I measured out on cardstock for each size that I need for a pattern. The larger piece I will use the tan cardstock to print off  the vintage sheet music "Irish Eyes are Smiling" (which I found on Pinterest) and the smaller one I will use the white cardstock for the vintage map of Ireland. (also found on Pinterest) Print out three of each and once printed, simply flip over and trace the appropriate pattern on the back and cut out. 

I looked around for some cute ideas for shamrocks. No worries if you can't draw a shamrock because we are going to make them the simple way...out of hearts!!  We are...I kid ya not.  I didn't have to look far for my inspiration in those either because I thought that the ones Luna made were perfect. Now if you have stamps and love to use them then this would be the time. I don't have any stamps (as the mister would kill me if I added any more craft items to my already overflowing inventory...hehe) If you are stamping then do both sides (you will understand why in a minute or two) Since I'm using the pretty ones Luna had I need something for the back side, so I'm  using a pretty printed piece of scrapbook paper that I have on hand. I printed off Luna's hearts (we need 15 of them) and then glued the papers together. (printed sides facing outwards) So much easier to do it this way so that when you cut the hearts out the backing will line up perfect. Here's what you should have at this point.


Take one of the music sheets and glue one of the maps pieces to the top of it. I think I will place mine almost in the center as I want the name of the music and the first line of bar notes to show. Now it's time to put together a shamrock. You will need 3 of your hearts to make one shamrock. With the prettiest side facing up you are going to gently crease it in the middle. (this is why both sides need to look nice)  

See the white poking out? This is what happens when you don't glue your two pieces of paper together BEFORE cutting out. HEHE (I did clip and make neat before putting together)

My shamrocks are going to be placed in different areas on top of the maps. Left side, center and right side....just to give it an off kilter balanced look. I'm going to place one where I want to attached it and push my dental tool (or large doll needle) through the banner where I will be using one of the brads. Don't put the brad in just yet because we need to glue our shamrock to the map. The first leaf you will place glue on the right side of the heart and place with the tip just touching the hole we made for the brad and press down. Take the second leaf and place glue on the left side and do the same as leaf one. Take the third leaf and glue the right side and follow as you did the first and second one. All three tips should be facing the brad hole. Now, insert the brad and close on the back side of banner. If you want to add some glitter this is the time to do it. I use fast drying fingernail glitter polish for my paper projects and it works great. Just sayin....just a thought of another way to do something using glitter. We all LOVE glitter, yes?


Now, we are going to make two shamrocks that we will place on either side of the center flag on our banner. You should already have the shamrock cut out but you will also need to cut out, using cardstock, a circle so that we can attach the leaves together as well as have a base to pull our twine through. 


This is showing you the back and front of circles. Using the dental tool (or large doll needle) poke a hole in the center of the circle. This is where we will be placing the brad to hold it all together.  On either side of that hole you will need to cut a slit. Don't cut to close to edges, you just need enough of a slit to guide the twine through. Punch holes in each leaf at the tip too and not to close to the edge. Hold the brad and slide each leaf onto it and then slide the circle on. Close brad.


This is what your shamrock will look like once you have all leaves attached to circle. You can use that glitter now. I know ya want to!!!! HEHE

Now all we have to do is using hole punch,  punch holes on each side of the flags so that we can run our twine through. I use myself as a twine measurer. HEY...it works peoples!! I take twine in hand and run out until I have enough out to reach chin holding arm straight out level to shoulder. I'm using three arm lengths. 


You should have a banner like this now. YEA!!! Where are you going to put your banner? It's going to look awesome no matter where you hang it. I'm so glad that you followed along and made one for yourself. 

It's on to making some chenille mischief makers for the tree now. WHAT??? Ya don't know what a mischief maker is? It's one of the wee peoples....leprechauns!!

Until next time...............get up and do something,

Regi

Thursday, May 1, 2014

Cute corner paper bookmark...YOU can make!!

As most know, I LOVE to read....so that makes trips to the library very common and VERY frequent. Yes, I still love to hold a book in my hand, smell the paper and mark my place when I have to reluctantly close it for awhile. I started sometime last year making corner paper bookmarks to take with me when I was checking out books and it seems that several of the patrons liked that idea. Now, every few months or so I take in a bunch to be given out. I thought perhaps some of you who love to read like I do, might just want a paper bookmark all your own. 

Here's what you will need to get started...not much....but every project has a few needed items, ri iight??

I love using these scrapbook papers for my bookmarks especially the 12x12 size because you can get 4 bookmarks out of one piece of paper. You can use anything really though. Gift wrap paper, old greeting cards or even print out your own images. I just like to use cardstock paper so that it will have some strength to it.
You will also need a ruler, pencil and scissors. The paper here is what I picked out to use as my "follow along" piece. So let's "Follow along"...shall we. hehe
 You want to measure your paper out to a 6x6 piece. 
 Flip it over on the plain side and turn like this. If it looks like a triangle then ya turned it right. 
 
 Take the bottom point and line it up to the top point and run your finger over it several times to get a good crease line...it should look like this. Then open it up, turn it once to the right and do it the same way again.
 Once you have folded the second time, open it up and place the top point and the bottom points centered in the middle where the crease line is. (See that's why I told ya to crease it earlier...cheat line)
 Fold it over and it should look like this.
 Flip it so that the longest part is downwards. Take one corner and fold over to the middle. You should see the crease line to use as the folding point.
 Do the other end the same way and you should have what looks like a bat flying really fast towards you. Well, that's what the Chazman says it looks like to him. ^_^  It should look like the picture above. 
 Flip it over and you will see that we make a little pocket. 
 Tuck one of the flaps inside the pocket. Then tuck the other flap inside. Once both are tucked in you can press the seams tighter with your fingers.
 YOU just made a cute little paper corner bookmark!!

These bookmarks really hold up well and can make cute little gifts. You can embellish them just about any way you want to. Just remember that they mark a page inside the book. 


Hope you'll try and make a few for yourself and friends. Let me know if you do, I would love to see them.

Until next time..........Hugs,
Regi

Saturday, February 15, 2014

'Laissez les bons temps rouler' (Let the Good Times Roll)

Oh yes....it's that time of year again and we LOVE it!! What time you ask? Mardi Gras time of course. ^_^


Did you know that Mardi Gras began first in Mobile, AL in the year 1703? Oh yes, it's a long standing tradition and one we just can't get enough of. All the parades, the beautiful bright festive colors of green, purple and gold and Owwww Weeeee...the food!! Ohhh and getting to decorate for it too. Gotta so LOVE that!! I don't go all out but it's enough to make folks smile when they walk in the door.


Some of the beads we caught at a parade (standing in the rain) last year.
Oh yeah....we love our parades rain or shine...hehe


Now this handsome fella is Mr Ted E and he gets dressed up for several holidays around here..like Halloween and Christmas. Click on the links and see if you can find him.....hehe!! He is sporting more of the beads we caught from last year and his sweet owl mask. It fits us humans too but he likes wearing it the most. I LOVE making things and thought I might do a small "How To" on this mask. Want to learn? Well, let's get to it. 


What you will need:

Cardstock
scissors
pencil
black markers
paint
glue
string
feathers

I used a butterfly shape on the cardstock and cut it out. If you aren't good at drawing, no worries because I have a template you can use. (it has several different mask templates just in case you want to make several different mask)


These were found HERE

After you cut out the mask then you need to cut out 12 feather shapes....making one a bit larger than the rest. (it's going to be the nose) and then start gluing them on. I used regular Elmer's school glue (and no it doesn't dry purple..hehe) on just one end not the whole piece. We don't want our feathers laying down completely flat now do we? 

.
Here's the way I glued mine so you will have a pattern to follow.


Now once all the feathers are glued on and we have let it sit for about 5 minutes to dry, we are going to do some detail work. I used yellow for the beak and I used off white for the feathers we just glued on. 


Once you have detailed using your paint you can see that the feathers are pulling up......just like real feathers...all fluffy!! If some are sticking up more than you would like simply put a tad bit more glue. Now you can do some detailing with the black markers.


I glued some real feathers at the ears and the crown and then punched holes on either side of the mask and used my green string so that I could tie it on Mr Ted E. (or the Chazman's) head.  If this mask is going to worn and taken off a good bit then I would put some clear tape over the holes before you punch them out. It gives that area a bit more strength. I also tie knots on the front side of the string to keep it from pulling back through. I added some pretty beads just to give it some Umph...boy style. ^_^  If you didn't want to do the tie on the mask you could glue or tape a straw to it so it can be held or perhaps a smooth tiny branch to let it keep that outdoor feel or you could make your own holder out of paper. Just take a 12x12 piece of paper and starting at one corner, roll tightly on the diagonal. Once you have rolled the entire piece take and tape the end down. If little hands are the ones that are going to be holding this then I might even neatly tape the whole thing. Just a thought!!

There are so many ways to make cute mask. You can use paper plates....simply cut plate in half, cut some eye holes and decorate. Did you know that letting your kiddo do an outline of their hands and then cutting them out makes a cute mask to be decorated?. Ohhhh, I kid ya not!!

Found this cute idea HERE.

It makes a great rainy day project or snow day project (for most lately it's several snow days inside) and one I hope that you will do and have fun with it. 

Until next time.........HUGS,
Regi

Friday, January 17, 2014

Happy Happy Friday!!!

Good Afternoon!!! So happy that you stopped by for a visit. Aren't you glad it's Friday and the weekend starts soon? I know that I am...I love my weekends. The Mister and the Chazman are home and I like that!!!
(another 3 day weekend for the Chazman so he was very excited that it was Friday)

I have been working on some beach theme jewelry and a necklace holder and before you even ask....yes, I made it using paper towel holders...hehe. So many things you can make with them and I plan on doing a few more "How To" posts on some new projects soon. You basically make these the same way as the bracelet holders except for a few small differences.


Instead of using a toilet tissue holder for the base, I used another paper towel holder. Looks like the base is longer, doesn't it? One of those optical illusions because they are both 11 inches long. I bet you see those strings hanging down too, don't cha? Well...those are one of the other differences with the necklace holder compared to the bracelet holder.


For the bracelet holder...the bracelets will just slide on...no problem but since necklaces can be different lengths and I didn't want to make the holder really TALL then I had to come up with some way to attached the necklaces without to much work in getting them off. Very simple.....I poked a hole near the opening that attaches the base to the holder and then poked another near the end. I ran a piece of cording through the first hole and came out at the end hole and then tied a good tight knot in the middle. Then I did the other side the same way. All I had to do was place the necklace over the holder, let part hang down in the back and then tie a simple bow. You can hang more than just three on each side just try and keep the sides balanced.


I used all paper on this holder....a vintage postcard print for the base and base holder and a metal tag print from my Colorbok collections scrapbook papers. You can get these from Wal-Mart or any supply store I feel sure. I like Wal-Mart though because they put them on sale a good bit. I LIKE sales!!! Oh and I did not misspell Colorbok...it is with just one o in book. HeHe  Around the base.....I always like to add an embellishment to help hide the hot glue. To this one I added some large burgundy hemp rope and two natural seashells.

I'm working on a design to hold earrings now and will post that as soon as I get it completed. I just love making my own jewelry holders. Don't you?

Until next time.............keep a shell in your pocket and sand between your toes,
Regi