Showing posts with label paper box. Show all posts

Sunday, December 15, 2013

Little mermaid is ready for her close up..hehe

Close up...well I said she was ready!!

I had so much fun making this for my niece for Christmas. I hope she likes her and will take care of her. Of course, she is still at that rough and tumble stage...can't decide if she is a tomboy or a little princess..most days she's both..hehe!! So we will see.


I made her scales out of stretchy purple cording so that they could hold the barrettes easily. Just clip them on and clip them off. Depending on the size of the bows it can actually hold about 7. I posted the three I made her and there will be one more but it's already in it's lil box. (New here? Would you like to make your own cute lil gift boxes? Click HERE) The little fishies bubbles can hold single hair twist and she can even hang a few on the shell. I just love my broken shells...they are just as pretty as the whole ones. If this one makes it through her "tomboy" stage and she actually starts wearing hair bows more than every so often then I will make her a bigger one. I am blessed to have a friend that turns into my muse at times and has no idea she does (until I tell her..hehe) She was telling me about these little dolls she made a long time ago that had long braids that you could attach bows to. Well....why in the world didn't I think of that with this one? Ohh man...V8 moment, ri iight?? The next one I make will have yarn hair instead of the paper hair and I will make several long braided strands so that they can be used as holders too. Hmmmmmm, Capt Jack (ummmmm..Johnny Depp just popped in there too) What were we talking about? Thinking thinking...OH YES...hair braids. Sorry, kinda got distracted there. I will make the braids like Capt Jack's,  with shells and trinkets too. 


These are the hair bows or accessories I made her. The top one is the one already in it's little box. The bottom one WAS one of my hemp/yarn bracelets. Things have a way of starting out as one thing and turning out into something completely different. I think it looks really cute as a hair barrette now. The pretty burgundy one with the pearl button in the middle I so love and it can be worn with a pretty dress or even with jeans and a tshirt. Princess or tomboy times..hehe  It's just pretty!! I wanted to let ya'll know if you make hair barrettes that I have found the perfect backing for them. Nicole's beadbacking!! It's great for this kinda project and any project where you need a sturdy yet workable/sewable/glueable backing. Keep her in mind for your next project!! She has an awesome blog herself and well...you should go visit. Really...GO!! Well...after you finish here first of course. ^_^

Now that I'm finished with all of my nieces gifts, I'm going to start on the teachers gifts. The Chazman gets out of school next Friday so I need to get busy busy busy!!! Ohhhhhh (looking around) I have to work on one of his gifts next week too while he is in school. I'm making him a baby dragon. He loves dragons almost as much as his momma does....almost!! HEHE He still proudly has his Seadragon I made him last year on his shelf so that he can see it while playing his games. 

Seadragon!!

Until next time.....Hugs,
Regi

Thursday, June 27, 2013

Getting all tied up in knots..hehe

I'm going to have to stop apologizing for not posting because it seems it has become a habit...LOL!!! Time truly is passing on by rapidly and I'm just going to have to hang on and enjoy the ride. I just hope that you hang in there with me and do come to visit because I will swing on the old Southern ooaks tree as much as I can. YOU make me want to...so please keep visiting and THANK YOU!!!

When these old eyes will let me, I have been working on a new sculpt as well as trying to finish up the last two pieces in the jewelry commision I have. I did finish the bracelet this morning and I really love how it turned out. I wasn't quite sure how the small natural hemp would look but I think it looks amazing.


Of course as with all my jewelry pieces, I made a cute little gift box to place it in. I normally make the box out of white cardstock but this time decided to use some bright colored blue cardstock that I had. I added a paper flower with a small acrylic flower bead in the middle and one of my vellum butterflies.


I love making my little paper boxes and they are so simple. If you are new to my blog and would like to learn how to make one for yourself, simply click HERE. I like to put tissue paper inside the box or I like to make my own filler. Making your own filler is really easy. All you have to do is cut some thin strips out of paper and then fold them like you would a fan...open them up and PRESTO...paper filler.


For those that have been visiting for awhile and have met my sweet gals, Gabie and Pumpkin, I thought I would give a small update. They are at that VERY rambunctious stage but also that very, very curious stage. I have had to move all of my craft supplies out of their reach (and sight) plus keep my desk drawers taped shut. Yes... yes, the lil demons darlins can open the drawers. I keep my hemp roping, beads and other small craft supplies in them and they LOVE to pull them out. I don't know if they are trying to make something or just enjoy making a mess...hehe!! When I'm working on one of my postings or just trying to catch up on reading some of your blogs, they are right here with me. I swaney that they actually read along with me and Gabie even tries to move the mouse for me. So love these furbabies!!!


Well, it's off to work on the necklace and perhaps get some clay in my hands too. What are YOU working on today? Something fun I hope.

Until next time......Hugs,
Regi (Gabie and Pumpkin)

Tuesday, June 4, 2013

Boho glass bead bracelet

Today I'm working on some BOHO jewelry pieces. One is for the friend I am doing some pieces for and the others will go in my Etsy shop. I went on a mad hunt for some black beads this morning and found some of my gemstone beads that I had totally forgotten I had. YEA....love to find treasures...AGAIN. HEHE ^_^

Here is the commission piece.....a blue and black hued BOHO bracelet I made using memory wire. The focal bead is a hand blown glass bead...so pretty!! (and before you ask...NOOOO...I did not make it myself. Fire and me DO NOT go together..at all...just sayin)


She requested that each piece have it's own little paper box. I want to make each one a tad bit different. (that way I can hopefully remember which jewelry piece is in which box) I like to use tissue paper or some kind of filler in the bottom so that the piece doesn't jiggle around to much and wouldn't ya know it...I didn't have any of either. Not a problem though cause I am the queen of reusing items...oh yes I am!!! I always have leftover paper when making the boxes and I keep them. Well..ya never know when ya might need a small piece of paper....like I did today. I cut it into thin strips and then folded each tiny strip into a small fan and then opened it back up. Instant filler!!


For the top of this box I did one of my small butterflies. Printed an image off onto vellum paper...added a small wooden bead in the center and tied it to the top of the box. So simple yet so pretty, ri iight??


Now back to more beading for me. What are YOU working on today? Something interesting I bet!!

Until next time..........Hugs,
Regi

Monday, June 3, 2013

Working on commissioned pieces of jewelry!!

A friend that has bought several pieces of my jewelry has commissioned me to make several more pieces for her. I love when my art helps bring folks into my life as what happened this time. She commented on some ooaks that I had made and we started talking back and forth and discovered that we live almost right around the corner from one another. Small world, eh?

I just finished one of the bracelets she ordered.....one of my hemp ones....the one with the pansy and the pearls.  She wants another one just like it but the roping in rose color. (someone has notified me that they are hopefully going to buy one of my teacup faeries and I so hope they do. I need to make a supply run)


I made one of my paper boxes to put the bracelet in and made one of my paper flowers with a button in the center as a decoration for it. I love making these little boxes....such fun!!

After I finish this post then I'm going to start on a memory wire bracelet she has ordered. Well....actually I think a horizontal pause is going to take place first and then I will work on the bracelet. ^_^

Until next time...........Hugs,
Regi

Wednesday, December 19, 2012

Let's make a little paper box..shall we ^_^

I know that a good while back (probably well over a year...I think) I did a "How to" on making a paper box.   It was made from card stock which made it sturdy enough to cover in fabric...which I did!! ^_^   I needed some little boxes to put the Chazman's little WhoDoo characters in and that's why I remembered my paper boxes from earlier. I really didn't want to make the heavy duty ones as I know good and darn well that these aren't going to make it through the opening up part..hehe. I thought that some of you might want or need a small box to put a gift in and well I thought you might just like to make it yourself.

Step One......using a piece of letter size paper, take and fold one edge up into a 90 degree angle. Like this...
Cut along the line with scissors or whatever sharp instrument (exacto knife, paper cutter) you feel comfortable with. Me...I do good with scissors. ^_^

Step Two......After cutting off the edge (you can throw this away or keep and use to make a little gift card with it later) Unfold paper...turn and fold opposite corner up to meet top corner. Once open you should have a nice X (or cross...depends on how you look at it) in the paper.

Step Three.....Take each corner and place point in the center of the paper. It should look like this when this step is complete.

Step Four......Take the bottom of one side and fold it to the middle. (Should look like photo below) Take the edge directly across from that one and do the same. Open them up and turn paper and repeat for those two sides.

Step Five......Open up paper and cut one side up to the center square. (Where my lines are drawn) Repeat on the opposite side of paper once completed. Only do the two sides!!

Once cut the paper should look like this.....


Step Six......Turn paper around and fold the first flap over. Then take and fold upwards. Take sides and fold inside. It should look like the second photo below after this step.


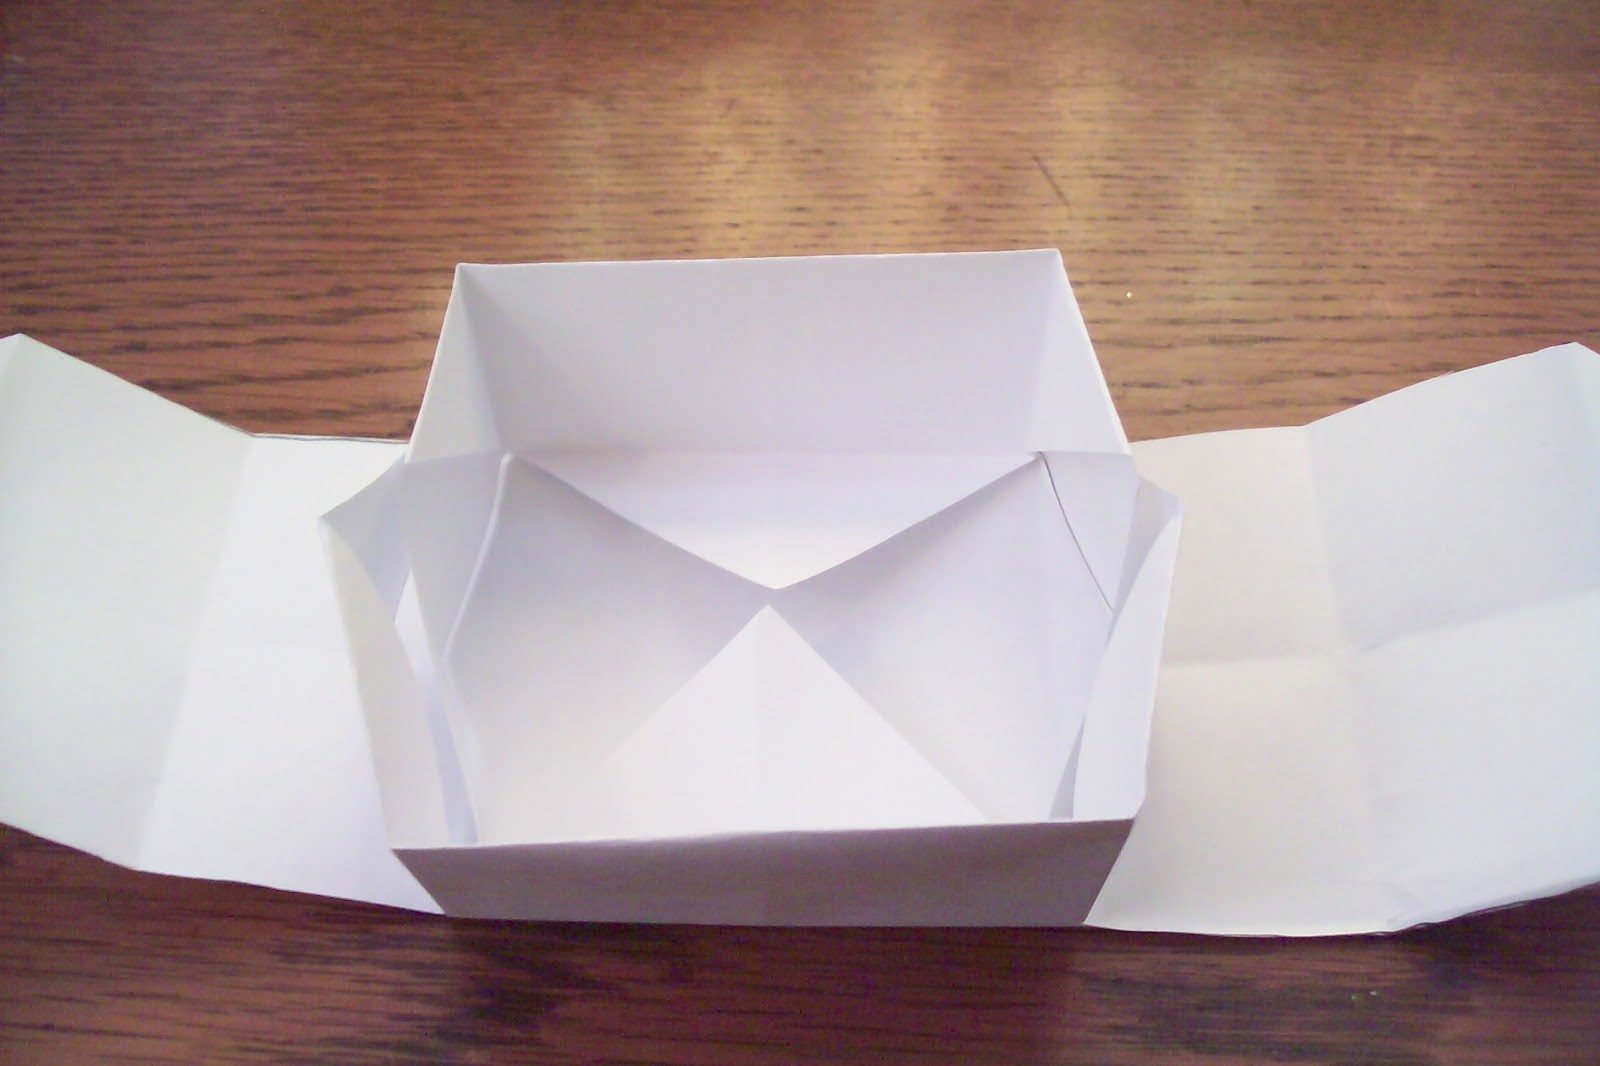
Step Seven....Repeat on the other side. Then take the smaller flaps and fold them over the sides making sure that your points on sides are tucked inside one another. (makes folding easier)


Now...wasn't that easy peasy? You just made the top part of your box. To make the bottom part follow the same steps. Just make sure after you fold the first edge 90 degrees, to cut about 1/4 in further than you did the first time. This will make the top fit over the bottom.

Now if you don't want a plain white box, you can use scrapbook papers, Christmas wrapping paper (just make sure your design is on the outside when folding...HEY...I forgot the first time) brown paper bags, really just about anything that can be folded easily. You could even color on the white paper or splash some paints on it and let dry or even do some stamping on it. Your imagination has no boundaries...remember that!!!

I left the Chazman's boxes white because I knew that the pretty pom pom bow I was going to make would pretty much cover what ever was on the paper. WHAT? You say you want to know how to do a pom pom bow? No problem..hehe  You will  need string or yarn...scissors (yes..just scissors this time) and a plastic credit card or gift card.


Step One.....Take string and measure out at least 84 inches. YIKES..that's a lot of string or yarn you say but it really isn't. YOU might even want more if you want a fuller pom pom. Just sayin!!

Step Two....Cut a separate piece of string about 6 inches...this is your piece that will tie all the other string together once you finish wrapping it around the card. Just lay it one way on the card (either way is fine..the longer side just make a bigger pom pom) and then start wrapping your string the opposite.


Step Three....Once you have wrapped all of the string on the card, take your tie off piece and tie it off. HEHE.  Then gently slide the string off of the card.


Step Four.....Hold both ends and flip it over. Tie this side and make sure you make two knots or ties here.
Take scissors and place in between loops on one end and cut. Repeat on the other end.


That's how you make a pom pom bow. You can fluff now if you want but I find it much easier to wait and fluff after you have tied it onto your package. I use a different string to tie around the package and then I tie the bow on.


Now you know how to make a little paper box with a cute pom pom bow. I hope my directions were simple and I hope that you can use this "How to" to help you out with some of your gift giving wrappings.


Until next time...........Hugs,
Regi

Tuesday, October 30, 2012

He wants his MUMMY!!

I did it again...didn't I? Let almost a week pass by without posting. Betcha thought those twenty-five li'l mummies took over my studio and started wrapping ME in crepe paper huh? THEY DID..THEY DID!!                  OK, well...perhaps they didn't really (thank goodness too because they sure were eyeing my hot glue gun) but do you know how it feels to have twenty-five pairs of eyes just sit and stare at you? I'll tell ya how it feels. It feels extremely...CREEPY...that's how it feels!! I swear I think that some of them actually turned to look right at me. Oh yes...I was just sitting here working on their crate (ok it's really a hand painted box to look like a crate) and several of them....Oh wait...they did turn to look at me...cause I turned them. HEHE

The Chazman is so excited about taking these to his classmates. He wanted to take them today but I told him he had to wait until tomorrow for their HALLOWEEN party!! I think that I'm going to have to make a new box crate before we do any other projects for his class as this one is starting to look like it really has been shipped back and forth from Egypt AND possible buried in the sand...under the pyramids. Not to mention it has been to the North Pole and back several times. I bet those elves played "kick the box crate" with it too. Oh Oh...and the Easter bunny...I'm sure he..well...let's just let that one go. A new box crate it will have to be. I had to use this one, one more time though, since I still haven't been able to get my ink cartridges because DANGGGG...they cost as much as a new printer. Now that really is a bit frightfully SCARY!! Thankfully, I had a few things already printed off and in a drawer....so....I used them.  It so pays to be a pack mouse (didn't say rat...mouse sounds cuter. Don't ya think?) Here's the box crate the mummies will be traveling in tomorrow ummmm I mean arriving in from Egypt. ^_^


Yeah yeah....I know...you're thinking "OMGOSH REGI, those postage stamps are HUGE". Like I said...I used things I had been saving and they ARE postage stamps from Egypt. I have to confess that when I printed them off I didn't want them to be so big. I get carried away working and trying to swat my muse away long enough to do something and then I get side tracked and (oh look out the window..two little squirrels chasing each other) What were we talking about? Oh yeah..the big stamps. See how easily distracted I can get..hehe  When printing them off, I forgot (imagine that) to change the size..so BIG FREAKING HUMONGOUS STAMPS got printed!! I don't like to waste anything so I saved them. YEAH ME!!


I have been wanting to use this cute little mummy and am so happy that I can now. The Chazman really liked him and wanted him on the box. He didn't care how or where but he wanted his mummy!! The little tag with him says "BEWARE....Open with EXTREME Caution".  HEY....if all twenty-five mummies jump out at once and start eyeing the kiddos.....I did warn them!!


Now as to this picture. It's a bit fuzzy looking, is it not? I think we heard something knocking on the box crate...the mummies want OUT and they want out NOW!! They made the box shake so my picture came out this way. Yeapers..that's what happened. It did...I kid ya not!! After we took this one, the Chazman picked up the box...whispered something to it....gently shook it and then put it in the closet.


Until next time...............Hugs,
Regi, The Chazman and the twenty-five Li'l Mummies

Friday, December 16, 2011

"Party like a ROCK ....party like a ROCKSTAR"

WOW....I can...like totally.....so understand that phrase now.   I know you are probably in shock...go ahead...run around the desk holding your face and screaming "It can't be so...tell me it isn't so".  Of course, it isn't so.....SO you can sit back down and relax. What I mean by the phrase is that I pulled an all nighter and I haven't done that in many many many (whew) many many many many...ok..I think ya get the point....years!! It seems that cutting all the different pattern pieces and then sewing 25 penguins takes a tad bit more time than I thought.

I will have to take another pic of one of the penguins when the Chazman gets in from school. Either my camera or perhaps even myself was a tad bit out of focus and the pic didn't take. I didn't make them exactly like the original one I showed ya'll in my earlier post. I didn't make them a hat but I did make their scarves out of real wool. I didn't get a chance to add my faux snow flakes or glitter either. I LOVE to play embellish with my faux snow flakes and glitter. I really do....even if I end up somehow wearing more of it than I should..hehe. DON'T ask!!!!

I did manage to get a few shots of the "BOX". You remember the "BOX"...ri iight?? The one I painted for the mummies to be delivered in. You do remember the "Mummies"...ri iight?? (why am I suddenly feeling like I'm in a very old detective story?)  I took the same box...HA....I bet you thought I was going to type "BOX" again...didn't you?  OK I need coffee to.....snap out of it....as the Chazman would say. Like I was saying..I took the package, removed the mummy info and touched it up a bit.

Why is it that the pretty twinkles of our glitter don't show up in pics.....arrggggg!!  I guess I will have to just tell you what I'm talking about. Three of the corners I painted with white paint...to resemble snow of course. The package is coming from the North Pole. Once the paint was dry, I added a coating of Twinkles crystal glitter. HEY...I did get to play with some glitter but sadly not the kind that you can wear...ummmm...I mean the kind that accidently spills on you like faery dust. Wait...I said "Don't Ask"  ^_^  so I'm not telling..so pfft ....there. My, my...please forgive...the rockstar in me apparently can't ROCK it all night long anymore...I am apparently delirious from lack of sleep.

I found these really cute tags online. I love the North Pole mailing label with the "ELF INSPECTED and SANTA APPROVED" stamped on it. The four little stamps really added to the.........package (gotcha) but I almost panicked when I went to print them off and discovered that my colored ink cartridge was empty. No worries though....I came up with an idea to use them anyways. Yep...I can come up with ideas when I haven't pulled an all nighter. I did the printing BEFORE the party!! I printed them off using my black only cartridge and then water colored them with my water color pencils. Love my water color pencils!! It gave them a vintage look...don't ya think? The big Santa tag is one that is appearing everywhere it seems. I really love it and knew it would add to the ........parcel.......so I printed it off in black only and painted it.There again..my twinklie, sparklie coating is not showing up. I covered Santa's beard, hair and eyebrows with it and it really looks awesome...not the dull color showing in pic. Could be the photographer though!!!

 Chaz said he is bringing the box and the tag home this afternoon. The tag he is going to hang on the tree. I just love when my kiddo loves something that I have made. Ahhhhhhhhh....let me sit and relish in that feeling a moment. Nooo, better not...I might nod off ^_^

Until next time............Hugzzzzzzzzzzz

Saturday, December 10, 2011

I made my own gift box..hehe

I hope that you read about how to make your own box in my last post. I also hope that they were easy to follow directions so that you could make some of your own. I enjoyed making the "How to" post so much for everyone that I made some more boxes...ten to be exact....LOL!!!  These were made for a purpose. Do you remember the flower garden I have been cultivating here of late? You know the one....don't you? The one that took up a weekend plus. Need a reminder? Just Click Here.   I made the boxes to hold these precious flowers plus I made three more flowers to add to the bunch.

I do hope that the little girls that receive them Christmas morning will love them just as much as I loved growing making them. I just love the fact that so many people are coming together to make Christmas a special time for the families that need the extra help. I'm very excited to be one that is able to use my whimsical talents to help out. Paying it forward is a motto that all of us should take to heart. I know that I certainly do. Let's take a walk and see the newest flowers clipped from the garden.


I love using fabric and ribbon. This little beauty of a rose was made from a wired satin ribbon and has cotton fabric leaves. Not only do I love using fabric and ribbon but I really love buttons. The prettier the better!!! On this one I was able to use two buttons. The white one looked like the center of a flower. How perfect...ri iight??  I just couldn't resist using this little butterfly button to go along with it. It's attached to a large clip barrette.


Here is another rose from the same bush. No thorns either...that makes it nice. We don't want any ouchies from our sweet little ladies.....now do we? I used one of my flower buttons for the center of this one and instead of a hair clip...I attached it to an elastic headband. Can't you just see a sweet baby girl wearing this?
Sit and imagine....now let's all say...........Awwwwww!!!


This little beauty is from the whimsical side of the garden. I had these fantastic, colorful fabric scraps that a friend gave to me in a big bag of.......scraps!! HAHA  They were just the perfect size to make these with. So important tip here.....never throw out those scraps you might think are to small to be keeping. I just adore all the colors in this one too. What do you think of when you see the colors? I think of ice cream..... Neapolitan ice cream and a scoop or two of sherbet thrown in with perhaps some peppermint. YUM!! I suddenly am in the mood for ice cream. ^_^   Hmmmmm...wonder why? Instead of raiding my button stash for these...I raided my vintage bead stash. Tiny, pretty pink pearls. The leaves surrounding the flowers are made from a ribbon. This one has a hair clip attached to it.

Now I have ten beautiful flowers in all to give away but I just couldn't hand them over to Ms Sue and say "Here ya go". I wanted them to be extra special so that's why I made the boxes. The box liked we talked about at the beginning of this post....the box that this post is suppose to be about. Sorry...I just had to wonder in the garden BUT at least I took you with me and you got to smell see the pretty flowers. For the boxes, I used white card stock......because I know that the box probably won't survive the opening process. I mean if they were big boxes...then they would be "priceless" but these are small boxes. I hope they do survive though because they are really cute and could actually be another gift in itself. For the top of the box, I found this cute vintage page from a children's book with rabbits....I love rabbits....don't you? Rabbits looking out the window at Santa and his reindeer flying over the snowy sky. I printed it off in black and white and then water colored it in to give it that vintage look for real. I applied a tiny bit of sparkle flakes to the rabbit tail....some red glitter by some of the holly leaves and even a teeny tiny piece of red glitter on the nose of the first reindeer pulling Santa's sleigh. RUDOLPH!!! Well....either Rudolph or the reindeer had one heck of a party the night before....but....that's....another......whole post entirely!!


Until next time.............HUGS, Regi

Wednesday, December 7, 2011

Making your own gift box!!


I know that there are several of us that like to make our gifts to give to our family and friends at Christmas time. (or for any of the special holiday traditions that are observed this time of year) I know that I do. For those items that are not very large....like say.....jewelry pieces.....small photo frames and small figures, why not make your own gift box. Scrap papers work great.....perhaps you have a special printed paper you have been wanting to use. Scrap fabric can be used to cover your box once made to make a gift all by itself. I mean what gal couldn't use a special made box to place some of her earrings or rings in? Or perhaps a cute Li'l pin cushion box with sewing supplies inside. There are so many ways to use a BOX!!!

Now that I have talked about making a gift box...let me show you how. It can be made to any size that you want. All you have to keep in mind is that you need to start out with a square shape. Now..go look through all those beautiful scrap papers you have, grab a pair of scissors and a pen and let's get started:
Supplies Needed:
Paper (scraps or perhaps a pretty print one)
Scissors
Pen

Take your square and pull one corner up into the other so that you have made a triangle. Gently crease fold.
Now open it up and turn it facing you where it looks like a diamond (or a kite...that's what the Chazman thought it looked like) Fold the bottom corner up to the top one, like you did for the first fold and then gently crease it.
This is how it should look so far. Got it? Good...let's move on. ^_^
Take a corner and fold it up to the center and then gently crease. Do this to each remaining corner.
Now take a corner and fold it up to the top cease across from it. Do this to each remaining corner. Isn't it fun folding paper? 
Up to this point, this is what your paper should look like. A quilt pattern. Now take a corner and fold it up to the closest fold. Do the remaining corners the same way and remember to gently crease your folds.
Hold your paper up so it looks like a diamond. Do you see the four little blocks that make a square in the center? Good...that is the size your box is going to be and the guide to making your cuts. If you look closely you can see where I made my marks to cut.
 You want to cut up the sides to the square in the center...remember don't cut past the corners of your square. Do this on the opposite side as well. Just the two sides across from each other. Do not cut the other two opposite sides...ppplease!!
This is what you should have....oh yes...turn the paper around so that the arrow is pointing to you. That was another observation made by the Chazman..such an observant kiddo...now if we can just work on his selective male hearing....LOL!!!
Now take the paper and fold it up to the square box in the middle. Then take the next fold and fold it over the top of the first fold. The tiny fold at the point will be inside the bottom of your box.
This is what it should look like at this point.
Take the pieces sticking out and fold them to the inside of the square. This is how it should look. Do the opposite side the same way. Then take the short sides and fold them over to the center the same way.
This is what it should look like after the first short side is folded in.
  TaDa......you made a box..
         well the top of one and I'm so soo proud of you.                                                                                  
The folds will hold themselves in but if you want you can take your pin and turn the box on it's side and crease the folds a bit more.
To make the bottom of your box you follow the same steps with this one exception. You need to make it a bit smaller than the top so they will fit together. Take your square and fold one corner into the opposite but instead of meeting them corner to corner you will need to pull it back a few centimeters, then crease fold.
Now take and cut off the overlaying sides of the triangle and follow the steps you did to make the top of your box.
Here is your box...all completely put together.
(Purple and Blue papers.. Reminds me it's getting close to Mardi Gras time)

Now you can embellish your new little box however you want to. I hope this tutorial was simple and easy to follow. If you have any questions, please feel free to ask away. ^_^

Remember in the beginning, I told you that you could use scrap paper for your box because it could be covered in scrap fabric. Well, here is one of my little boxes covered in fabric.
Keep in mind if you do plan on covering yours in fabric to take into consideration that the bottom will have to be a bit smaller than you would normally make it so that it will open and close easily with the extra bulk of the fabric.

Making a box can be used not only for this time of year but for Valentines, Easter, Halloween or just for a special birthday. Now....go make a box....and have FUN!!! I would love to see what you make...if you decide to do one.

Until next time.....HUGS, Regi