Showing posts with label shells. Show all posts

Wednesday, November 12, 2014

What do you see when you look at certain objects??

Happy Wednesday morning peoples!! Ya know what Wednesdays mean.....it's getting closer to those three nights and two days that we all seem to love so much. The weekend!! I'm hoping that ours will include a beach walk cause heaven knows, I NEED more shells....hehehe!!

I finished the tree topper yesterday and Robin loves it. I love making special pieces and then having them loved as much as I loved making it. That's a lot of LOVE peoples!!


Pretty, yes? I really enjoyed making this piece. I had originally planned on using 4 of my oyster shell angels but it would have been to wide at the bottom to be a topper and also probably to heavy. Don't want a leaning tree that could topple over, now do we? I ended up using three angels and instead of the cockle shells I use on my single hanging angel I chose to use scallop shells. Turned sideways they do look so much like a pretty wing. I'm thinking of making a few of the hanging ones with both types of wings and even sculpting a few of the faces instead of using the moon shell. Still in the muse whispering stage at the moment though. ^_^


As I stated yesterday in my post, that I was going to work on the two projects, I actually got both completed. I think Santa turned out rather...........beachy.....hehe!! I love using items I find on my beach walkabouts. Every shell on these were found on walks taken in Gulf Shores. The moss is from a walk in the woods (in Wetumpka) from a long time ago that I dried out myself. So...all are gifts from Mother Nature, that were just laying around, waiting for someone to see what more they could be.

What do YOU see when you look at certain objects? I've always been one to see "hidden" objects in just about anything. A wooden floor, a rug, paint swirls on walls, clouds overhead and even shells. Santa just JUMPED out at me with these two. I must confess that I have more shells that have Santa peeking out of them as well.


Here's some I'm going to be working on today. Notice that some have additional oysters started on them? What do you see? I see some sweet kiddo faces or perhaps an elf. Who knows just WHO will pop out once I start with the clay.

Until next time..........LOOK,
Regi ^_^


Monday, November 10, 2014

It's Monday and time for an angel to come visit!!

Happy Monday peoples. I can't say happy good morning because I kinda let the morning slip on pass me. It's lunchtime already. Geez...someone grab Father Time by the coat tails and slow him down, will ya? ^_^

Are you following along with the seashell projects? I hope you are. I would so hate to think that I have been talking to myself here. HEHE  No matter really though cause (looking around) I do it often....talk AND answer myself. It's nice though if YOU are following along. I would love to see some photos of any that you have made from my How To's. Please!!! Purty please!!


Yesterday I promised that we would make an angel ornament today and boy is this one easy project to do. The hardest part is where ya have to go and find the shells and then leave the beach. I mean, isn't it so hard to walk AWAY from the beach. I know it's hard for me and I can go anytime I want. I'm so easily distracted..what were we talking about....oh....yes....a project. What you will need for this project as seen in the above image are the following:

Oyster shell
Cockle shells (2)
Moon shell (small)
Wire (20 gauge)
Beads (4-5)
Moss
Hot glue gun and glue sticks
Twine

So easy to do. Make sure that you clean and dry all your shells before putting together if you haven't already done so. Take the oyster shell and place either side up that you want to use. I really liked the outside of this one but if the inside is prettier, you might want to use that instead. It's your angel!! Place the cockle shells sideways on either side at the top and then place moon shell turned sideways in between cockle shells. The cockle shells are going to be her wings and the moon shell her face. Doing this lets you see where to place the shells before you start to glue anything down permanently.

Finished project. 

Cut a piece of twine about 4 inches long and knot the cut ends together. I normally do two knots to make it strong. Take your glue gun and place a line of glue on the back side at the top of the oyster shell and lay twine over it. This will be the hanger so make sure it has enough length to add a wire hanger or even enough to use the twine as the hanger.

Next, taking your glue gun you want to add a dab of glue to left top side of the oyster shell and attach one of the cockle shells. Turn the cockle shell sideways so it looks like a wing. Take the moon shell and place sideways next to the now attached wing so that you will know exactly where to glue the other wing and leave enough room to add moon shell afterwards. Now, do the same thing to the right top side to add cockle shell. Once that's done add dab of glue in between the cockle shells and place moon shell sideways.


Cut about a three inch piece of 20 gauge wire and thread about 4-5 small beads on to it. This is going to be her halo. Once beads are on wire, take wire and place around pointer finger and cross wire over in back and then twist until you have a small stem coming down. Don't twist to tight on finger because you don't want to be part of the halo, do you?? ^_^  To keep beads from moving add a tiny dab of glue to both ends or you can fill up the halo part with beads. Remember, it's YOUR angel!!

Take some of the moss and add to the top of the moon shell. This is her hair. Add as much or as little as you want. After moss is attached add a dab of glue to the back of moon shell and attach the halo stem. I normally put a small dab on to the stem as well for add support and strength.

You angel is completed. See, I told ya it was an easy project. A beautiful ornament made by you using gifts from Mother Nature. What could be better? Perhaps making several and giving as gifts? Or perhaps making several to hang on your tree? You know how to make them now  so make several and have FUN!!!

Until next time............spread those wings,
Regi


Sunday, November 9, 2014

Happy Sunday...look UP today and say "Thank you"

Happy Happy Sunday peoples. I hope that's it's a beautiful morning for you all. I know it is for me because I woke up. ^_^  That's always a good thing, yes? Matter of fact I woke up at 4ish and have been doing that a good bit here lately. It's hard for a night owl to suddenly want to be an early bird too. Confusing...very confusing indeed!!

To continue with the beach theme decoration projects that I started yesterday I thought with it being Sunday that my shell cross would be the perfect one to share.


Pretty yes? I stated yesterday that I'm making these beach themed projects where they can be enjoyed year round but YOU can always add any embellishment you like to make it be for that one special holiday. These would also make great gifts to give to that special friend that loves everything beachy. What could be more perfect as a gift....one made by you from gifts that Mother Nature donated.

I do my projects as what I teasingly call "The Starving artist way" because I try to repurpose items in doing them. You can of course change out the repurposed items for other items you may want to use. That can be a good thing for some....a chance to go to Hobby Lobby or Michaels. YEA!!! I have to be very, very careful when going there because if the mister EVER finds out what I actually pay for supplies I do buy....well...there's going to be some trouble. HEHE!!  Now, what were we talking bout...oh yes...here's what you'll need to get started with this very simple project.


28 Scallop shells
Piece of heavy cardboard
Piece of printed cardstock
Hot glue gun and glue sticks
School glue stick
Scissors
Twine
Ruler
Pencil

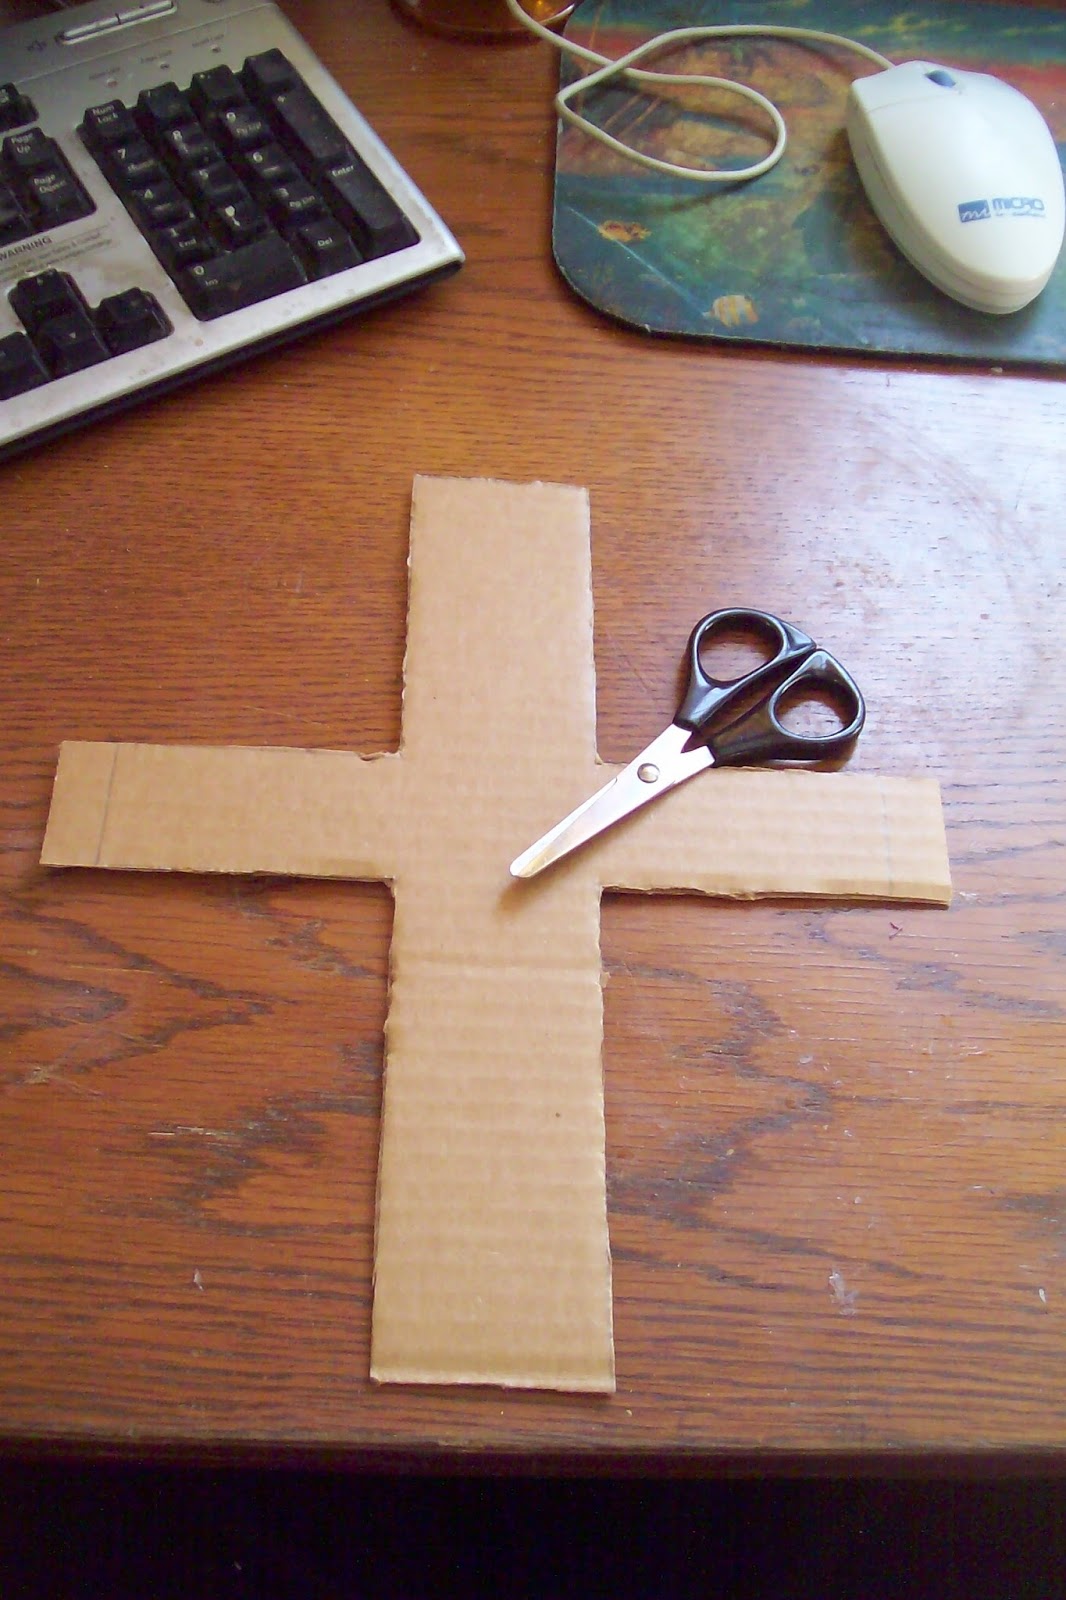
My cross measures 10 1/2 inch by 8 1/2 inch and is about 1 1/2 inch wide. You can of course make yours as big or as small as you like just keep in mind the size of shells that you are using cause you don't want the cardboard peeking out. This is also where a trip to a craft store could happen peoples if ya don't want to do it the starving artist way. (ie...buying an unpainted wooden cross) Take your piece of cardboard, ruler and pencil and draw your cross onto the cardboard. Then cut it out.


 My pretty piece of printed cardstock that will be my backing. This piece is embossed so it will give the cross base even more strength to hold the shells. (If you chose to use the wooden base then leave it natural or cover with a piece of felt.)


Now there are two ways you can do this next step. You can lay the cardboard cross down and trace around the edges onto the back of the printed cardstock, cut it out and then glue it on OR to make sure it's a perfect fit (for those of us that can't seem to trace or cut a straight line) simply glue the cardboard cross to the whole piece, wait for it to dry and then cut around the edges. HEY...I like to give several different ways to work peoples. I use the glue stick to do this as hot glue can make it a bit bumpy underneath.

Once you have the printed cardstock glued onto the cardboard then you're ready for the next step.  Let's put the twine hanger on. Doing it now makes it so much easier then later...believe me....trial and error peoples, learn from my errors. Poke two holes in the top of the cross base and then run your twine through each hole and bringing them through to the front of base. Tie at least two knots and then hot glue it down to the board. This gives it added strength. (If you are using the wooden base then make sure you buy one of the frame hanging kits so you have a way to hang up when completed and do add it before adding any shells. Don't want to crack any of those lil beauties)
Next we are going to place the shells on the cross base so that we will know exactly how to space them before gluing them on permanently.  Makes things so so sooo much easier. Once you have them spaced the way you want them then it's time to start making some marking lines.
 Marking lines make sure that you glue shells where they need to be. It's a bit time consuming but well worth the extra effort in making sure your cross looks uniform. Simply lay your shells over to the side as close to how you had them on the cross and picking each one back up place on cross and mark where your glue line needs to be. You will put glue there as well as a small dab on the inside top of shell to attach to other shell before it. (The first shell will simply be attached to the cross tips. Yes...start at the top and work your way down until you come to the middle. Turn cross and do the same for the other three sides...meeting in the middle.)
 Here's what the middle will look like once you have all sides of the cross complete. Take four smaller scallops and glue them as shown in picture. Then take a shell large enough to cover hole and glue that to the four shells. Add a smaller shell on top of that and your cross is complete. This is where you could add embellishments if you desired. I love it just the way it is, so that I can hang it year round.

I hope you will take some of your scallop shells found on those beach walks and make a cross for a friend or even for yourself. Of course, you can use whatever shells you like, just play around with them. Have FUN!!

Until next time...........Blessings,
Regi

Tomorrow we're going to make a oyster shell angel. Come back and learn how. ^_^

Saturday, November 8, 2014

Let's do something with shells!!!!

Happy Saturday morning peoples!!! Brrrrrrr.....Mother Nature is really enjoying herself with us folks here on the coast in Alabama. She's making us wear socks with our flip flops...hehehe.  It's 47 right now and to us that's freakin frrrreezing peoples. That's alright though cause it means our humidity is low and that's always a good thing. ^_^

I've been asked to teach a few craft classes this fall and winter at Beach Reflections and the Blue Mermaid, the little gift shop I help out at so I'm going to let YOU be my guinea creatures (umm didn't want to call anyone a pig...hehe) So let me know what you think and if you have any suggestions on classes that I could teach...well...speak up peoples...let me know!!

Living at the beach means lots and lots of beach walks, which means lots and lots of shells being taken home. I thought a few projects using those shells and making some keepsakes would be a good thing to do. Also, since Christmas is getting closer and I know AGAIN with us living at the beach that a good bit of folks like to use a beach theme for their decorating. Heck fire...even those that don't live here but still have a love of the beach like to use shells too, yes?


Let's get started with the first project I want to show you. This is what I call a "Mermaid's Kissing Ball". Everyone needs a mermaid kissing ball or two or three. Here's what you'll need to complete this project:

Glass ornament ball
shells (of course)
hot glue gun and glue sticks
toilet tissue tube
hemp or twine
Scrap Paper
Scissors

Yes peoples, you saw one item correctly.....a toilet tissue holder. If you don't like repurposing them then you can make the base for this project out of heavy cardstock. I LIKE to repurpose items.....keeps them out of our landfills and saves me money. ^_^  (remember....starving artist here most of the time)


This is going to be the base for the kissing ball so you need to decide how tall you want it to be. Decide...then cut it down. You need to make a smooth straight cut so use a ruler if you need to and don't discard the other end. You might want to use that too but I'll explain a little further down in the directions.


Next step is to take the hemp or twine and wrap it around the tube. Be very careful cause we all know how HOT hot glue can get. Start with a small bead of glue and attach twine then run a small line close to the bottom edge and start wrapping. Run a small line of glue and then wrap...small line of glue and then wrap. Okay...I think ya get the point!! Once you have wrapped twine all the way to the top run a small bead of glue on the inside of the tube and attached the end there. It's going to be hidden so ya don't have to get fancy.


Take the tube and place on a sheet of scrap paper and trace around it. I know the twine is there but if you hold your pencil straight up then you will be able to trace a perfect circle. Take the cut out paper circle and place on top of the beadbacking and then cut out the circle that we are going to glue to the base. Makes it look finished and neat. Run a thin line of hot glue on the base of the tube then simply sit the tube down and gently press. If you need to do any trimming then wait until glue is dry and then just trim. (it's alright, we all have to do that sometimes)

Before I go any further I know some might be asking "Regi...what is beadbacking?"  OMGOSH...I can't believe you had to ask cause it's a wonderful product that every crafter should have on hand. It has a thickness that works wonders not just for making base bottoms like we are here but can be used for so many projects. Flat bead work, embroidery, canvas for drawing, painting or stenciling and I love the fact that you can not only use glue on it but you can sew on it too. Like I said.....great product to have on hand!!


Now that the base is finished let's start the FUN part shall we. Using those lovely shells you have. For my kissing ball I used dog whelk shells. Just love their texture!! For this I used the other end of the tube (see why I told ya not to discard) to hold the ball while gluing shells on. I didn't want to get glue on the finished base peoples...I know how messy I can be..hehe. DO NOT glue the ball to base until project is completely finished.  Taking your pencil once the ball is sitting on the tube, mark around the top of the tube (bottom of the ball) so that you will know where to stop adding shells. You can of course add all around but really no need to since we are going to be gluing the ball to the base once finished.  Look through your shells and pick out ones that will fit around the top (like in the second photo). Once you have that first roll picked out then it's time to glue. Put a good dab on the ball and then place shell on top and hold for just a second or two. Do this til your first roll is complete. Next, dig through those shells and find ones that will fit and look nice glued in between the first roll (as in third picture) Start gluing and repeating this step until you have glued down to your marking line at the top of the base.   Once all rolls are done simply take some smaller shells and fill in any gaps. Now....you can glue the ball to your finished base.


To add the hemp bow to the top I ran a piece of hemp under the wire that would normally be used to hang the ornament. I then took about 2 arm lengths (that's how I measure peoples. HEY...it works for me. An arms length measurement is taking the end of the hemp in one hand and pulling your arm straight out to your side, shoulder height, and the other end will be at your chin.) Take this and letting about 2 inches fall down as an end tail, start making a bow. I just make this kind by wrapping the hemp back and forth from one side to the other and holding it firmly in the middle as I do this. Remember to leave about 2 inches on the other end as well. Take a small piece of hemp and tie in the middle of the bow as this will make it easier to handle when adding to the ball. Take bow and lay on top of hemp you run under wire and knot several times and then trim those ends to match bow ends. Now is when you can use one of your broken shells if you want to. I LOVE my broken shells!! I glued one to the middle of bow just to make it even prettier.

Now...you have a Mermaid's Kissing ball. Make several to place on a mantle or even to use as a centerpiece on the table in the foyer or dining room.  I kept this one simple so that it can be used  year round but you can add so many different embellishments to give it what ever holiday look you want. You could also use different size glass or wooden candle holders to give them a different look.

I hope you will make your own Mermaid Kissing ball now and I also hope you enjoyed this "How to". I love sharing ideas and projects and I hope that it's one that will get some interest for one of the classes I will be offering at the shop. ^_^

Until the next time...........Hugs,
Regi


Tomorrow I'll be showing "How to" make a shell cross!!!

Friday, May 16, 2014

Destash...Destash...Destash

What does "Destash" mean? It means to Remove (yarn, fabric, equipment, ect) from one's own personal collection. I think it should add to the end of that definition.....to SHARE!! (or at least offer)

I told ya'll yesterday that I was going through some of my (whimper whimper) supplies and goodies to make room for some more. CRAZY...yes? Remove some to just bring in more...hehe

I went through some of my shells and section I have set up to make jewelry pieces and thought I would put together a few small necklace kits. They're in my Etsy shop, so if you're interested just POP on over. I even put directions on "How To" make them on the listing too. Very easy!!


Here's what they will look like once put together. Simple but what a great beach theme keepsake. If you order one and would like me to add one of my little paper gift boxes (in case it's a gift you will be giving instead of keeping) just let know and I will add it to your package. If there is an interest in these then I might put together a couple more.

Once I went through my tiny shells, I dug into the ones a bit bigger and came up with these nice destash groupings. (Also can be found in my Etsy shop....just sayin)

 Oyster shell, conch shell, olive shell, auger shell, 3 scallop shells and three Banded Sea stars.

 Oyster shell, cerith shell, auger shell, olive shell, three scallop shells and three Banded Sea stars.
Oyster shell, conch shell, olive shell, auger shell, three scallop shells and three banded Sea stars.

So much you could do with this nice grouping, eh? Start a shell collection, add to a shell collection, beach theme decorations, art supplies for that beach theme project and I'm sure you can think of many more uses. Since I can not get these into a small flat rate Priority box and have to bump it up to the medium then I will add a few more oyster shells (the projects with these are so many too) and even a small bag of beach sand. HEY, don't call the sand police on me. I don't go and scoop up baggies of sand. My sand comes from all the shells that I bring home. Before I wash them up, I make sure to give them a good shake and believe me, after 4 years of beach walkabouts and shell hunting I have accumulated a good bit of sand. 

Today I think I might go through some of my fabric and see just what I can bare to part with...hehe  I'll let ya know if I can ummm I mean what I come up with. 

Until next time...........Hugs,
Regi


Friday, January 31, 2014

I'm so dizzy...my head is spinning!!!! HeHe


Do you remember this song? Some of you probably don't since it was recorded in 1969 but I remember it AND before you go and be thinking "WOW....Regi sure is old". I was only 11.  Now you're also probably wondering why in the world I posted this to begin with. It's because I spent all day yesterday cutting out my tags for my jewelry and shell designs and got EXTREMELY dizzy in doing so!!! Yea Yea....I know...I'm dizzy all the time but doing all that cutting and turning of the paper well, it just made my head spin. (it also reminded me of this song)


They turned out really cute, ri iight?? It was the seahorse that had my head a spinning but it was well worth every single seasick feeling. Ohhhhh...I made a funny. Did ya catch it? Cutting out seahorses and getting sea sick...water. Ohhh never mind..hehehe   Now what was I saying...oh talking about the tags. I used recycled cardstock. I found a cute seahorse and just did the outline and then as you know, cut it out. I'm old school plus the mister won't let me buy any of the cute stamps that I could have made these with. Mean Man!!  The shell card came from an image I had saved on my computer some time back. I think it was from a card that was stamped (see..I could really use some of the cute stamps available....MEAN MEAN MAN)  I'm always looking at images and saving the ones I might use down the road.  On the back of the shell card I wrote....

This item is a true (ooak)
One of a kind
Designed by S Regine Moore
using natural shells found
on beach walks here in
Gulf Shores, Alabama


I like how they look on each piece. I'm going to take just a few items to Beach Reflections to begin with, to see how they do. I still have to get some glass containers to do the hermie habitats this afternoon and will get everything delivered to the shop by (fingers crossed) Monday.

Today is going to be a squishing of the clay day. I'm trying to decide just what or who I'm going to have coming in or going out of some shells..hehe

Until next time..........keep a shell in your pocket and some sand between your toes!!!

Regi

Tuesday, December 31, 2013

Not letting 2013 follow into the new year!!!

I'm one of those that never wants one year to follow me into the next. Good or bad, the past year is over and a new fresh one is beginning. With that being said, I was sitting and looking at my Christmas decorations late yesterday and decided that I wanted 2013 to stay in the past where it belongs so I needed to put all the decorations away so it could do just that. 


All are packed up and ready to go back out in the shed until next year. YEA!! I always hate when I first take them down because well......frankly....it makes the house look "NEKKID" for a bit. I know I shouldn't look at it that way. I should look at it as having a nice clean house back, which is a good thing. I have to admit though (looking around) that I did leave the small tree I had in the B&B room in the closet so that I can pull it back out next month and decorate it for Valentine's and then again for Mardi Gras and then again for Easter. Oh yes...I love to decorate a tree. If ya remember I kept the big tree up last year and decorated it for January and February, but decided it was just to big and took up to much room to do it again this year. Not to mention I used the January winter paper ornies I made on the Christmas tree and packed them up..hehe 

I do like  having my nice clean house back....I really do. I like having my teapot collection back out with Alice and her gang mingling in between. Just love Alice, Mad Hatter and March Hare!!!


Do you see (looking around AGAIN) the little pedestal in the corner? That's where I'm going to put the little tree on in February and March to decorate it..hehe  I'll actually get to decorate it February (Valentines) March (Mardi Gras) and April (Easter). It's going to be FUN!!!!

Since I was able to get everything done last night I had this morning to take the Chazman to get a much needed haircut. He wouldn't let me take a photo...he's being shy today. Awwwww!!!! Then we went to the library....we love the library and then to Stacey's and ate lunch. They have the BEST sampler platter of salads. Tuna salad, chicken salad and egg salad. It's so good it'll make ya wanna slap yo momma...but don't, please...that wouldn't be very nice. 

After we got home I decided that since I have some books to read that I wanted a pretty bookmark and since I have been going through my shell stash I found some pretty shells to make one with. I'm thinking about making some to put in the souvenir shop if I can find some more pretty shells. 


Now....it's a bit chilly (where's my lambswool blankie?) so I'm going to go snuggle up in my reading chair and read a bit. 

Until next time..........Hugs,
Regi


P.S.  I hope that everyone has a wonderful New Years Eve. Stay safe, don't drink and drive and remember that 2014 is going to be a very good year. A very good year indeed!!  Come and visit often because I plan on giving away lots of goodies this year BUT you have to come visit to find out what and when!!!

Monday, December 30, 2013

Shell Digging...for reals!!!

Happy Happy last Monday of 2013!!! I'm so excited about the new year coming and some of the adventures I'm going to take. Like being one of the local artist placing her things in a new awesome souvenir shop that's way more than just a souvenir shop. Don't know about it? Well, just go back one post and read all about it!!!

I have been digging in my shell stash and have found some pretty ones and ones that match and are the same size. WOOHOO!!! I love finding those because they make for some really purty earrings. See......


The first three sets of earrings were made using cut ribbed ark shells. Very common here but so pretty. The last set was made using what's called an olive shell. I didn't polish them either...these came from the ocean like that. All were found on one of my beach walks in Gulf Shores.

I'm working on some hemp rope bracelets and some bookmarks that I will be using some of the olive shells with and also one of my tiny conch shells.


Those little black thingies in the back are hermit crab eyes. No silly...not real ones but beads I use to make them with. No live hermit crab would EVER be harmed in this household. ^_^

Most know that visit me often...know that I have been making some of my beaded memory wire bracelets. I love the tiny turtle beads I have that are cut from real turquoise. I made this bracelet using one of the turtle beads along with other beads that are jade and two sea glass beads that a friend sent me. Another purty one if I must say so myself.


Now that's what I'm up to today and I hope that you are doing something that you love too. Have a great Monday and enjoy the remaining days of 2013.

Until next time..........Hugs,
Regi

Sunday, December 29, 2013

It's time to make out that New Years Resolution list, ri iight?

It's getting closer to the New Year. Like most I make a list of what I want to accomplish, start, end or just need to do in the new coming year and this year I only have one item on it. Yeppers, just one and one that I intend to keep.

1. Walk on the beach as much as possible

Of course there will be more things that I plan on starting and accomplishing in 2014 but I don't need to put them on a list. I just need to set them as goals and then hopefully reach them. So....what's on your list?

I'm so looking forward to taking my walks on the beach and I'm going to start just as soon as the Chazman starts back to school on the 2nd.  It's been a bit too chilly to brrrrave a walk right now and I don't want the Chazman to get sick before school starts back, so we have stayed away from the beach. I'll be heading that way though as soon as I drop him off when school does start back and plan on taking my time enjoying what Mother earth and the gulf have set ashore to be discovered. Might not be everyday but it's going to be at least once each week. That's a good goal, eh? 

In my past walks I have found tons of broken shells and I love using them in different projects. I have found some beautiful whole shells too but I need to find some special ones. Special as in ones that a hermit crab would like to find. HEHE  A sweet friend, Diane Guthrie Davis and one of her sweet friends, Fonda Thomas are opening up a new shop in Gulf Shores called, Beach Reflections LLC, and she has asked if I might want to put some of my beach themed items in it. Well, of course I said YES!!! (and did a little jig too...well...I did) They will be in one of the cute beach houses located at 112 E 1st Avenue and will be opening up part time January 6th. They plan on the hours of 10am until 5pm, Wed-Fri. Then on March 1st, they are going to 6-7 days a week and opening up at 9am until. Diane and Fonda are both amazing photographers and will have some of their work in the shop. They both work with IDo Gulf Coast Weddings so keep that in mind if you are planning a beautiful beach wedding here. If you want some great family shots done...well...they do that too. You can contact them at 251-978-4754.  Their shop is not your typical beach gift shop either peoples!! Just a few things they will be offering are Landon Bailey photos (an award winning 12 year old photographer from Ohio), Steve Jones Coast Cards, (Mr Jones is very well known here for getting up each and every morning and capturing our beach and it's inhabitants) Michael Thomas prints, DieHard Images of RI, Kelvin Espada prints of Destin, FL, Homemade candles, seashell items, jewelry, tshirts and souvenirs made by locals. (and I'm going to be one of those locals....WooHoo) Come summer time they will even have bike rentals. Like I said...not your typical beach gift shop...it's going to be so much more!!!

Now that I got so excited about telling you all about this new store, let me tell you why I need shells that a hermit crab would want. You were wondering, I know you were. ^_^  Diane had asked a question not long ago about what was something you would take home from a visit here to our beach. That was an easy one!! Before we moved down here (yes...we are some of the ones that came to visit and didn't go home..hehe) the Chazman would walk through some of the souvenir shops and would always end up at the hermit crab cages. I must admit that they are very comical characters and are so much fun to have but they just don't last very long. He did keep his two alive for almost 2 years and that is something I've been told. He said that he didn't want anymore because they die so fast. Well.....with Diane's question and how the Chazman feels, it seems they both became my muses. Ya'll know how much I love my muses!!! I thought, wouldn't it be wonderful to have a hermit crab inhabiting a shell found on our beach with it's own little habitat of some of our beach sand and you NEVER had to feed it? NEVER...EVER!!! The Chazman and one of his buddies loved the idea and want one and I'm hoping even more will too once they see them.


Isn't he cute?? This one is sitting inside of a moon shell. It's one I found on one of our beach walks this past summer. Each one will be in a shell found at either Gulf Shores, Orange Beach or Ft Morgan. Now ya see why I need some new shells!! I plan on putting them inside of a mason jar and poking holes in the lid. (they have to be able to breath..hehe)  There will be a tag on each jar that will tell what type of shell it is, with the year and where it came from.  Don't YOU want one? Well...you now know where to find them come this summer...at Beach Reflections!!

Until next time.............Peace and Hugs,
Regi