OH MY but scales can be tricky little things. I'm not talking about the kind that we step on to see why in the world our clothes are starting to shrink either peoples. Bahahaha!!! I'm talking about the kinda scales that are attached to a dragon. YES....I said.....DRAGON!!
If you are one of my favorite peoples (thank you for always visiting by the way) that come to sit under the old ooak tree often then you know that I'm working on a project for a swap that I'm participating in. The EWWL Halloween Flea Market Follies swap. So many talented folkes in this group!! Check it out when you get some time. NOT YET though...stay here and finish reading and then you can. ^_^
I'm working on the tail this morning since a dragon's scales overlap each other from the bottom to the top. Makes perfect sense too because I'm sure it would be VERY hard to fly if they were the other way around. No aerodynamics at all backwards unless of course it was a backwards flying dragon that is. Wait.....I'm getting way off my subject for today. Like I was saying before my imagination took flight (ohh I made a funny. Get it? Flight...Flying...Dragon?) I'm working on this dragon's tail piece. I decided to use heavy cardstock which I will paint once all the scales are laid down. I thought that perhaps YOU might be interested in just how I'm making the tail piece. I mean just in case you might want to make a dragon for yourself. It would be a fun project for a rainy day....just sayin!!
 First thing you have to do is decide what size you want the scales to be. My first one measures 5 x 5 and the remaining scales I'm using a 4 3/4 x 4 3/4 plus a few smaller ones for the tip of the tail. I'll probably use a 6 x 6 as the final one that will attach the tail to the body.
 Take the square piece of paper and turn it facing you where the shape looks like a diamond. Fold the bottom tip to meet the top tip and crease gently.
 Open piece back up and with still facing you in the diamond shape fold the bottom tip up to the center line you just made with the first fold. Do the same for the top tip.
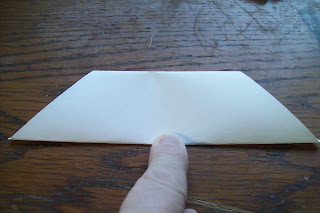 Once tips are facing each other in the middle then fold bottom up to top. This should be easy since you already have your fold line there to guide you.
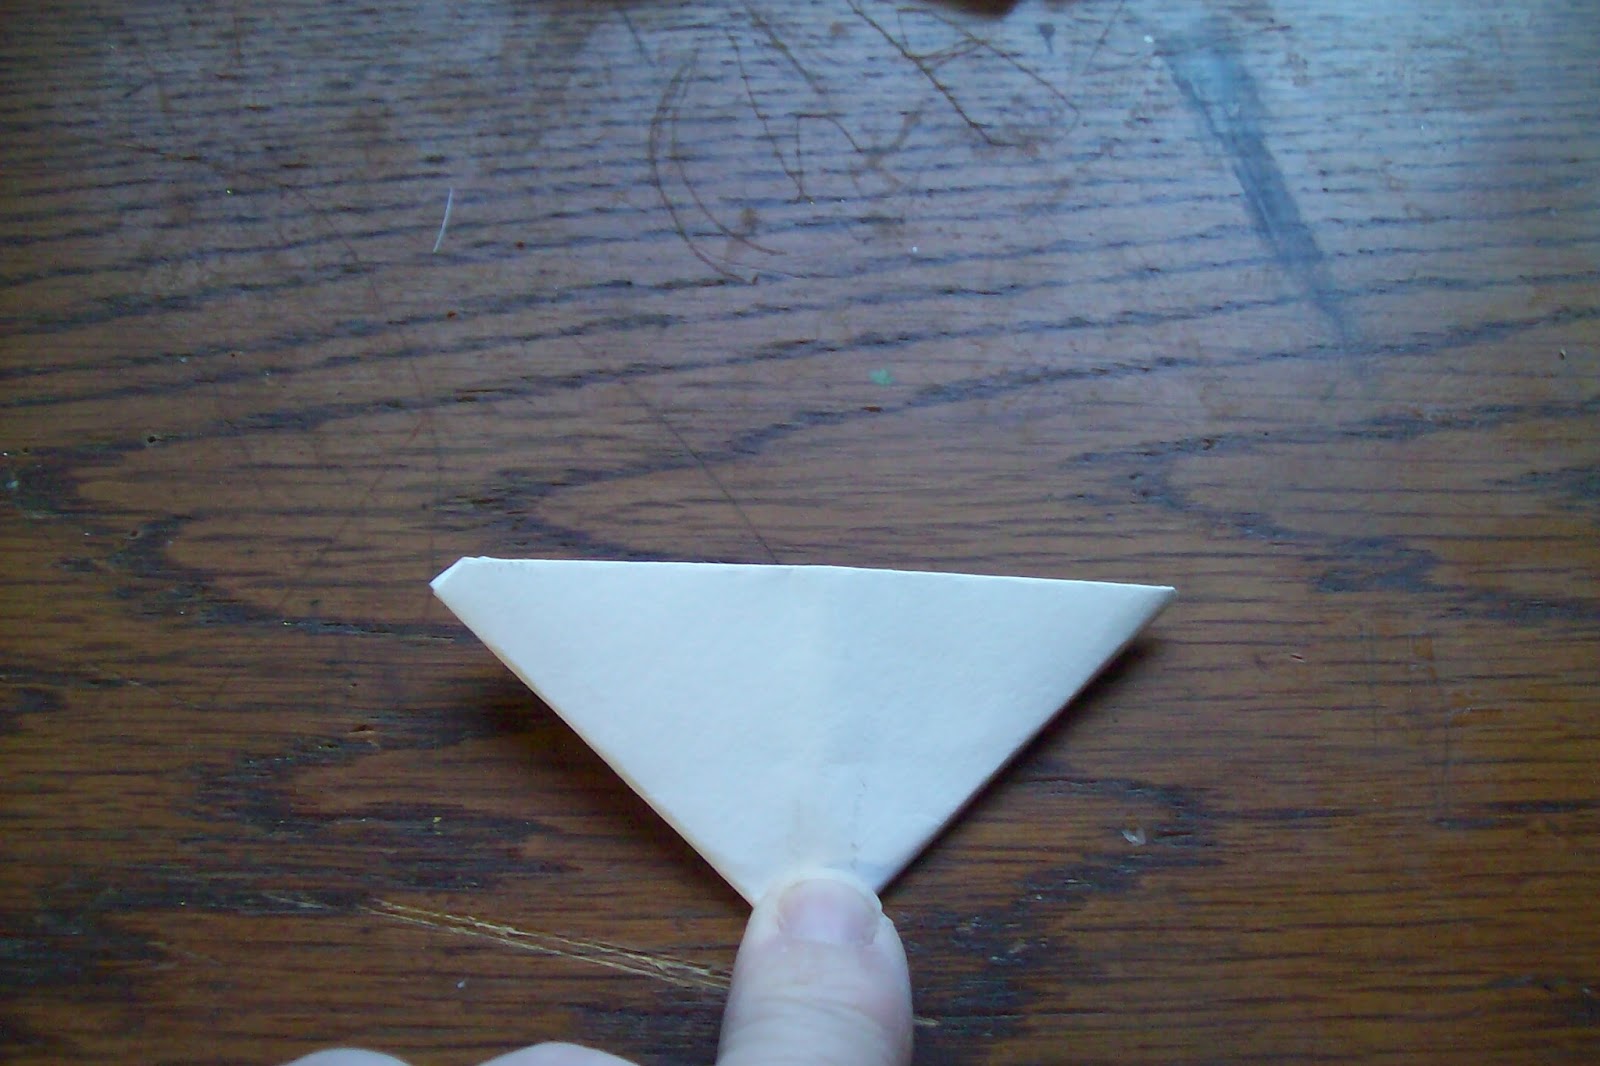
 Now take left corner and fold over to meet the right corner. Crease along outer section gently. This creates the guide line you are going to need in the next step.
 Open piece up. Easy so far, yes? If you do follow along with me from time to time then these steps probably seem VERY familiar to you from a past post. One where I showed you how to make a paper corner bookmark for your books. Love when you can do one thing for several projects. ^_^
 Now take your finger and place on guide line and fold the left side over and gently crease. Do the same for the right side as well. Flip it over and you should have a tiny pocket. Open it up enough to fold the flaps inside.

 Now at this point you have that bookmark I was talking about earlier but we are going to go one step further to turn it into a dragon scale for this tail.
 Simply take the left corner and right corner in your fingers and push them together to form a scale.
 I'm sliding each scale inside the previous one but not all the way in. It's starting to look like a dragon's tail!!!
Once I have the tail the length I need then I'm thinking of running a wire through the middle of all the scales before I glue them together so that I can bend it.
Now back to making scales. I hope you enjoyed this "How To" and can use it for either making paper bookmarks or even for trying to make a dragon of your own. Which ever you choose.....just have FUN!!
Until next time............
Regi
If you're new here and want to see what my item I received in the swap is and that I'm having to change then click HERE.
If you are one of my favorite peoples (thank you for always visiting by the way) that come to sit under the old ooak tree often then you know that I'm working on a project for a swap that I'm participating in. The EWWL Halloween Flea Market Follies swap. So many talented folkes in this group!! Check it out when you get some time. NOT YET though...stay here and finish reading and then you can. ^_^
I'm working on the tail this morning since a dragon's scales overlap each other from the bottom to the top. Makes perfect sense too because I'm sure it would be VERY hard to fly if they were the other way around. No aerodynamics at all backwards unless of course it was a backwards flying dragon that is. Wait.....I'm getting way off my subject for today. Like I was saying before my imagination took flight (ohh I made a funny. Get it? Flight...Flying...Dragon?) I'm working on this dragon's tail piece. I decided to use heavy cardstock which I will paint once all the scales are laid down. I thought that perhaps YOU might be interested in just how I'm making the tail piece. I mean just in case you might want to make a dragon for yourself. It would be a fun project for a rainy day....just sayin!!


Image to show what flaps inside should look like.


Once I have the tail the length I need then I'm thinking of running a wire through the middle of all the scales before I glue them together so that I can bend it.
Now back to making scales. I hope you enjoyed this "How To" and can use it for either making paper bookmarks or even for trying to make a dragon of your own. Which ever you choose.....just have FUN!!
Until next time............
Regi
If you're new here and want to see what my item I received in the swap is and that I'm having to change then click HERE.
No comments:
Post a Comment