Showing posts with label reindeers. Show all posts

Saturday, January 11, 2014

A lil saying is coming to mind!!!!

Oh yes it is...the saying "It's raining, it's pouring, the old man is snoring" HeHe and he really is too. He loves to sleep in (when he can) when there's a storm outside and MAN OH MAN is it ever storming. Way too wet to go outside so what better way to spend the morning than to snuggle down and sleep, sleep, sleep. Of course, some of us just can't do that (muah for one) but it is to wet to go outside so for me.....well.....I'm going to snuggle down and READ.

I thought for YOU...since you're here anyway....that I would link up some of my old post on "How To" things that you might want to do. I mean.....like....when the weather's bad or you are just looking for something to do with your hands. (working with your hands.....therapy in it's best form)

So let's get started and I hope you find one or two that you will like and hopefully want to try. The first one is for those old belts just "hanging" (hehe) around. You can make some really cute wristlet with them that can be worn by male or female. I made some for teenagers and both genders loved them.


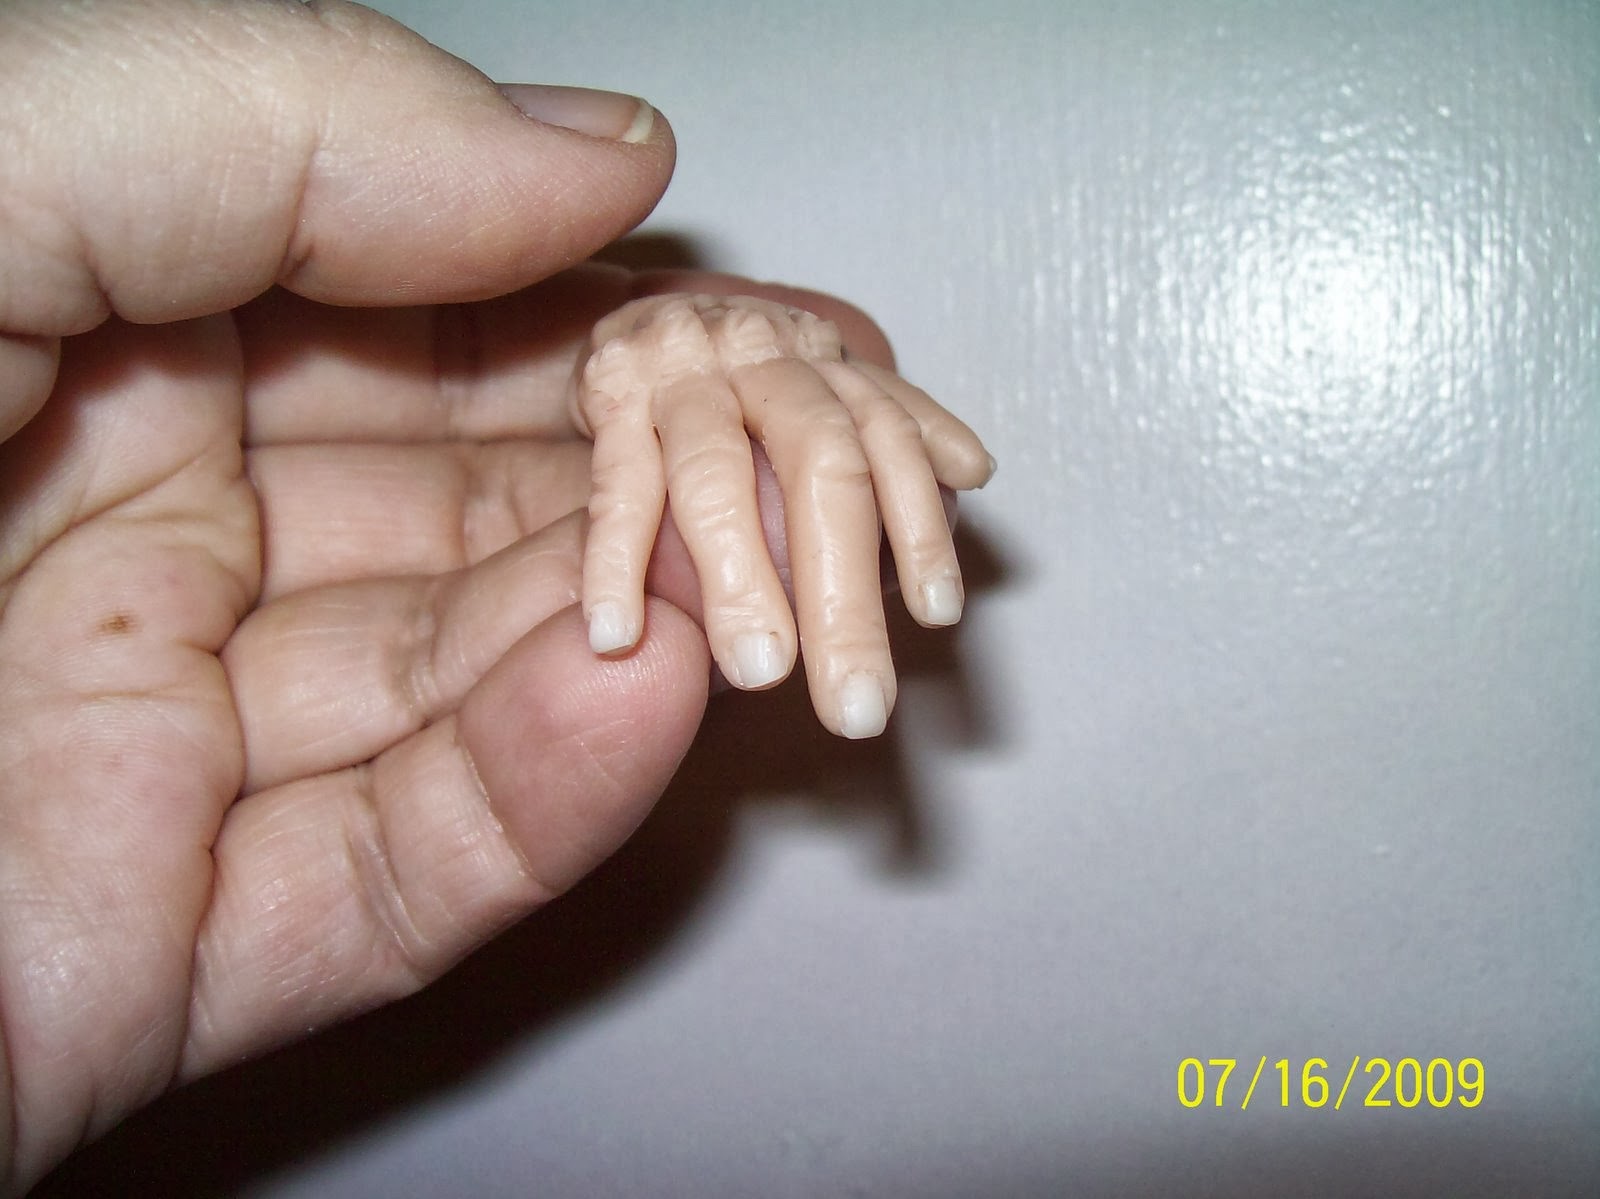
If you are one that would like to try making a clay character yourself then here's my "How To" on making hands for one. It's a simple way and one that works really well for me. I hope this helps you want to perhaps try to make a character of your own. I guess I need to do one on making a head...hehe. There are some really good ones you can find on google. 


Now this is one for Christmas but it's still one I wanted to share with you. It's "How To" make a reindeer. I made these a few years ago for the Chazman's classmates one year and they LOVED them. I still have some of them come up to me and tell me they still wear them. Makes my heart feel so good.


So there's a few for you to try and if you would like a few more just take a wander under the old Southern Ooaks tree. I'm sure something will catch your eye. Have a wonderful Saturday and come back again real soon.

Until next time.........Hugs,
Regi

Wednesday, December 14, 2011

Make a Reindeer!!


The reindeer itself is one of the Chazman's doodles....not one that I did for him but one he did for me. I just took that and made my pattern. If you don't have an upcoming artist in your household...no problems...just draw you a pattern for my "HOW TO" that I'm getting ready to do for you.

Supplies Needed:
Felt or Fur (in two different shades)
Black Seed Beads
Black Pompoms or red if you want to make Rudolph
Pin backings
Jingle Bell
Brown Embroidery floss
Black thread
Stuffing/Batting
Hot glue
Glitter or MICA flakes

Now keep in mind that these are simple, FUN pins to make..so you can design your head and antlers in any shape you want. Decide what size you want and then fold over the felt or fur....leaving the fold as the top of the head. (do not cut the fold) This what you should have once you cut out the head.
Next step is to sew on the eyes, nose and pin backing. I use regular black thread to sew these on with. I don't cut my thread after sewing the face but I do make sure I knot each one before I move on to attaching the next eye and then the nose. I add one line under the nose over to the side for a mouth. You can add one...or not. Remember..this is your reindeer. After face is complete then turn the head around so the back is facing you and sew the pin backing on. Here is what you should have after this step:
Next are the ears and antlers. Again...keep in mind what these look like on a real reindeer. Here is the design that Chaz did. The antlers should be a darker color than the reindeer and ears.
I sew the ears first. Just a few stitches...simply fold them in half and sew at the bottom...so they have what looks like a tiny ear hole in them. Open them up and then sew them to the bottom part of the antler. Then sew the two bottom corners of the antlers over the bottom of the ear. Here is what they should look like.
Now...let's attach those ears to the face. Take the face and fold over so the face is in front and the back is well....in the back ^_^.  Take the ear and place right at the fold in between the face and back. I use a simple whip stitch with 3-ply embroidery thread. Once you have the front whip stitched then turn it around to the back and stitch the same way. When starting on the front I start at the bottom of the ear so that I am working my way up and around to the back and then I'm lined up to whip around the face. Now...whip around the face. When you get to the other side about half way...STOP...it's time to stuff that face ^_^. It doesn't take much....you just want to fill the face out a bit so it doesn't just lay flat. Our reindeer needs a bit of personality!! Here is what it should like at this stage.
Once you have the face filled out, place the other antler in it's space and stitch the same way you did the other antler. Just remember to stitch it to the front and the back. Don't want any little hands pulling Chet's (that's what Chaz calls his reindeer...LOL..yes we watched the Santa Claus movies this weekend) ear to hard and pulling it off. Now add a jingle bell or two to the bottom and your finished. Here is what the finished piece should look like.
Of course....all of you that know ME...know that I can't have a plain reindeer. I took all of my little herd and using my glue gun and some MICA flakes...I made it look like they had played in the snow. The possibilities are endless here people...honest...just use those imaginations. OK...you need some ideas..well..here are a few. You could sew some of those miniature strings of lights to his antlers and top of his head like he got all tangled up in em. Or perhaps some of those tiny plastic snowflakes that come in a string like garland...sew those to the antlers. Or maybe if you want to make him look "cool" you could make him a tiny leather collar....and owwwww maybe a little leather hat to go ummmm....HEY...I know YOU and I know that you have just as vivid an imagination as I do...well..ok..maybe not everyone but I know you can do it...so do it!! Then let me see what your reindeer looks like...I love to see when someone else has used a shared idea.

I hope that you have enjoyed this repost...yep..it's one I did last year but thought I would share it again for my new friends I've made since then. OMGOSH....and I'm so not calling those that were here for last year's post old...nope...not doing that. Besides..I'm sure I'm older than most anyways...so that would be the pot calling the kettle black huh?  LOL

Until next time...............HUGS, Regi

Wednesday, December 22, 2010

DON'T forget to Feed the Reindeer!!

The first of December always starts the excitement building in our household. That's when we start our count down using our reindeer " # of Days til Christmas". But there is just something almost magical that happens when we hit that #3 day. This is the time when we make sure we have all the family gifts wrapped and under the tree. The time that we decide what cookie we are going to make for Santa to enjoy on his visit with us. The Chazman (and Daddy of course) have picked out Chocolate Peanut Butter Chip. A tradition we started when Chaz was 2 was that he and I made the cookies on Christmas Eve so they would be nice and warm. We place them on a special "Cookies for Santa" plate and we even have a special "Santa milk mug" just perfect for dipping those warm cookies in.
Now leave it to the Chazman to not forget about all the reindeer. He states.....they have to eat too...they are the ones doing so much of the work pulling that big, jolly Santa around with his sleigh chocked full of toys for all the good BOYS and ummmm oh yeah girls...hehe!! So here is another tradition started when he was a wee one....on the first of December we start making our special reindeer treats. Chaz says that everyone knows that reindeer love sweets so that is what we mix for them BUT we add "good for you too" things just to balance it out. As the Chazman puts it.....we don't want those reindeer bouncing off the tops of roofs now do we? ^_^  What's in our mix, you ask? Well, let me tell you. We start with a good base of oats (perfect way to use that last cup of oatmeal in the container) as the month goes on and as Chaz eats his cereal (like Cheerios and walnut Special K) he puts the little bit that always seems to be left in the box into the oatmeal container. Instant Reindeer food!!! A few days before Christmas Eve we take our oatmeal container, add some dried corn, some green and red sprinkles (or MICA flakes for this year...they are earth and animal friendly) and we have the perfect mixture to put out for (taking a deep breath) Dasher, Dancer, Prancer, Vixen, Comet, Cupid, Donner, Blitzen and Rudolph...unless of course Comet eats to much junk before take off and Santa has to let Chet fly. (yes my child loves all the Santa Claus movies with Tim Allen) We make bags up for all the cousins so they can feed the reindeer too. It makes for a fun tradition. (it's also a great way to feed the squirrels and birds....that is IF the reindeer don't eat it all up)
With each little bag, we do the cute little munching reindeer with his comic book saying and attach him to the bag with the following saying (that must be said out loud before you throw it on the lawn)

I'm sprinkling this reindeer food outside tonight
So the moonlight will make it sparkle bright
So all Santa's reindeer that fly and roam
Will have this magic feed to guide them to my home

I hope that this fun, simple event might be added to your family traditions...and that you are enjoying all of your traditions....old ones and new ones. We here at the Moore homestead wish to all a very Merry Christmas and a joyous New Year!!

Until next time.......Hugs, Regi