Showing posts with label fun. Show all posts

Saturday, November 8, 2014

Let's do something with shells!!!!

Happy Saturday morning peoples!!! Brrrrrrr.....Mother Nature is really enjoying herself with us folks here on the coast in Alabama. She's making us wear socks with our flip flops...hehehe.  It's 47 right now and to us that's freakin frrrreezing peoples. That's alright though cause it means our humidity is low and that's always a good thing. ^_^

I've been asked to teach a few craft classes this fall and winter at Beach Reflections and the Blue Mermaid, the little gift shop I help out at so I'm going to let YOU be my guinea creatures (umm didn't want to call anyone a pig...hehe) So let me know what you think and if you have any suggestions on classes that I could teach...well...speak up peoples...let me know!!

Living at the beach means lots and lots of beach walks, which means lots and lots of shells being taken home. I thought a few projects using those shells and making some keepsakes would be a good thing to do. Also, since Christmas is getting closer and I know AGAIN with us living at the beach that a good bit of folks like to use a beach theme for their decorating. Heck fire...even those that don't live here but still have a love of the beach like to use shells too, yes?


Let's get started with the first project I want to show you. This is what I call a "Mermaid's Kissing Ball". Everyone needs a mermaid kissing ball or two or three. Here's what you'll need to complete this project:

Glass ornament ball
shells (of course)
hot glue gun and glue sticks
toilet tissue tube
hemp or twine
Scrap Paper
Scissors

Yes peoples, you saw one item correctly.....a toilet tissue holder. If you don't like repurposing them then you can make the base for this project out of heavy cardstock. I LIKE to repurpose items.....keeps them out of our landfills and saves me money. ^_^  (remember....starving artist here most of the time)


This is going to be the base for the kissing ball so you need to decide how tall you want it to be. Decide...then cut it down. You need to make a smooth straight cut so use a ruler if you need to and don't discard the other end. You might want to use that too but I'll explain a little further down in the directions.


Next step is to take the hemp or twine and wrap it around the tube. Be very careful cause we all know how HOT hot glue can get. Start with a small bead of glue and attach twine then run a small line close to the bottom edge and start wrapping. Run a small line of glue and then wrap...small line of glue and then wrap. Okay...I think ya get the point!! Once you have wrapped twine all the way to the top run a small bead of glue on the inside of the tube and attached the end there. It's going to be hidden so ya don't have to get fancy.


Take the tube and place on a sheet of scrap paper and trace around it. I know the twine is there but if you hold your pencil straight up then you will be able to trace a perfect circle. Take the cut out paper circle and place on top of the beadbacking and then cut out the circle that we are going to glue to the base. Makes it look finished and neat. Run a thin line of hot glue on the base of the tube then simply sit the tube down and gently press. If you need to do any trimming then wait until glue is dry and then just trim. (it's alright, we all have to do that sometimes)

Before I go any further I know some might be asking "Regi...what is beadbacking?"  OMGOSH...I can't believe you had to ask cause it's a wonderful product that every crafter should have on hand. It has a thickness that works wonders not just for making base bottoms like we are here but can be used for so many projects. Flat bead work, embroidery, canvas for drawing, painting or stenciling and I love the fact that you can not only use glue on it but you can sew on it too. Like I said.....great product to have on hand!!


Now that the base is finished let's start the FUN part shall we. Using those lovely shells you have. For my kissing ball I used dog whelk shells. Just love their texture!! For this I used the other end of the tube (see why I told ya not to discard) to hold the ball while gluing shells on. I didn't want to get glue on the finished base peoples...I know how messy I can be..hehe. DO NOT glue the ball to base until project is completely finished.  Taking your pencil once the ball is sitting on the tube, mark around the top of the tube (bottom of the ball) so that you will know where to stop adding shells. You can of course add all around but really no need to since we are going to be gluing the ball to the base once finished.  Look through your shells and pick out ones that will fit around the top (like in the second photo). Once you have that first roll picked out then it's time to glue. Put a good dab on the ball and then place shell on top and hold for just a second or two. Do this til your first roll is complete. Next, dig through those shells and find ones that will fit and look nice glued in between the first roll (as in third picture) Start gluing and repeating this step until you have glued down to your marking line at the top of the base.   Once all rolls are done simply take some smaller shells and fill in any gaps. Now....you can glue the ball to your finished base.


To add the hemp bow to the top I ran a piece of hemp under the wire that would normally be used to hang the ornament. I then took about 2 arm lengths (that's how I measure peoples. HEY...it works for me. An arms length measurement is taking the end of the hemp in one hand and pulling your arm straight out to your side, shoulder height, and the other end will be at your chin.) Take this and letting about 2 inches fall down as an end tail, start making a bow. I just make this kind by wrapping the hemp back and forth from one side to the other and holding it firmly in the middle as I do this. Remember to leave about 2 inches on the other end as well. Take a small piece of hemp and tie in the middle of the bow as this will make it easier to handle when adding to the ball. Take bow and lay on top of hemp you run under wire and knot several times and then trim those ends to match bow ends. Now is when you can use one of your broken shells if you want to. I LOVE my broken shells!! I glued one to the middle of bow just to make it even prettier.

Now...you have a Mermaid's Kissing ball. Make several to place on a mantle or even to use as a centerpiece on the table in the foyer or dining room.  I kept this one simple so that it can be used  year round but you can add so many different embellishments to give it what ever holiday look you want. You could also use different size glass or wooden candle holders to give them a different look.

I hope you will make your own Mermaid Kissing ball now and I also hope you enjoyed this "How to". I love sharing ideas and projects and I hope that it's one that will get some interest for one of the classes I will be offering at the shop. ^_^

Until the next time...........Hugs,
Regi


Tomorrow I'll be showing "How to" make a shell cross!!!

Thursday, June 5, 2014

Tacky Jack's was a total success!!!

OMGOSH....I have never smiled so much in my life. OK...well...perhaps I have, but it's been a very long time to have smiled as much as I did yesterday and it made my face actually hurt. In a good way though, a VERY good way. ^_^

My pieces were liked by all and even a bit of oohing and ahhing going on. That to me, as an artist, is the greatest compliment...when others truly like your work. I'm feeling like this is just the beginning of a very good relationship with Tacky Jack's and this quirky artist.

The displays should be up by the first of next week and rest assured that I will be popping in and taking some photos to share. There are going to be some really great works by some really talented artisans in our area.


While waiting to meet with Tara, I discovered that Tacky Jack's isn't just a place to eat and shop. During the summer months Tuesday thru Friday's, they have some things a going on. What things ya ask? Well, let me tell ya.

Tuesdays: Hands on Habitat 
(Free for ALL ages. 11am-12pm)

This is a day of fun and learning.
You will learn about our ecosystem
(and boy do we have an interesting one)
You'll get to interact with some of the
animals that live here, thanks to the
great folks at our little zoo that could.

Other sponsors for this day will be
Gulf State Park Nature Center
Ocean Camp
Down under dive shop

Wednesday: Art al fresco
(Fee:Child and Adult prices based on what's being offered)
11am-12pm

What could be more fun than creating new works of
art? Well...not much if ya ask me..hehe Some of the
events going on will be painting, clay work and yesterday
there was a class of Ductigami goin on. FUN!!

RSVP is required for this day, space is limited.
Oh yeah...the fee will included supplies needed
for the event AND lunch. YUM!!

Thursday: Coast 360 Beach Games
WOOT WOOT!!!
(Free for ages 6-11 years.11am til 12pm)

Have a fun loving competitive edge? Come play then.
Relay races, challenges and brain teasers galore.
Prizes for winners and all participants get free lunch.
(that's makes everyone a WINNER)

Parents won't be left out...they can play in a game
of water balloon dodgeball...hehe

Friday: OBF (Oyster Bake Fridays)
(11am til 4pm)

Come and enjoy some delicious oysters made right
in front of you and "Umm Umm Ummm" grilled to perfection.

There will be LIVE music, Corn hole, sand pile, FUN and games
for the whole gang.

Start your weekend early!!!!

See what a great place Tacky Jack's is? Make sure you stop by when you come down to visit. Ya know ya want to!!! 

The Chazman talked me into lunch there and OMGOSH, talk about being full and happy, happy afterwards. I soooo went off my diet but HEY, I can cheat every once in a while, ri iight? We had one of their famous appetizers, Mexican garbage. This big, ole pile of goodness makes a meal....believe me it does and DID!!

Yummy!!

Before any one ask....NOOO, I'm not a spokesperson for Tacky Jack's...HAHAHAHA....but I do love the place and I sincerely hope that when given the opportunity that YOU will come and find out for yourself what a FUN place this is.

Until next time...........Hugs,
Regi

Friday, February 1, 2013

February Holiday Tree is up!!

Well....we might be fighting that gnarly, nasty bug here but nothing and I mean NOTHING was going to make me break my promise to my Chazman about our Holiday tree. I promised him when we talked about doing this, that it would be changed out to it's new holiday the first of each month. A promise to your child is one that needs to be kept.

HAPPY FEBRUARY BY THE WAY!!!  February is a month with several holidays...like Ground Hogs Day which is tomorrow and Super Bowl Day which is Sunday (yes to some that is a major Holiday..hehe) There's Mardi Gras and Valentine's Day which we are celebrating with our tree. There's also Ash Wednesday and President's Day too. So many possibilities!!

A friend gave me a beautiful mesh ribbon wreath for my birthday this past October (thank you so much Shannon) and I have it hanging on my front door....sooooo...naturally, it is going to get decorated. ^_^  It is such a pretty wreath and I'm going to try and keep it looking that way and what better way than to use a pretty Mardi Gras mask and party horn and oh yes.....a few Mardi Gras beads that we caught in the past.


The Chazman got to choose which Holidays we had the tree represent this month. He picked very well I do believe. I wanted to pull the two together so I made two of my Mardi Gras paperdolls holding pretty glittery hearts. As well as making some cute little Valentine's paper tags and heart clothes pin holders.


What would Mardi Gras be without the laughing and sad jester's? We added those to our tree too....of course we had to separate them so no trouble would be cast about...one at the bottom, one at the top. HA!!


There is tinsel with happy carnival faces and strands of Mardi Gras beads all around the tree. We love it!! So happy that we decided to do this.


The Chazman has a special strand of beads that actually have the jester beads on it. The tree kinda overwhelmed it so we found a place that it would be seen and enjoyed. A new addition for this month to the tea party gang.


So that gnarly, nasty bug may have me down but so not out. I kept my promise to my little man and he is smiling brightly. He made my day when he told me that "I was the bestest mom in the world....cause I was making such AWESOME memories with him". Now that is the bestest medicine a mom could get when not feeling well. ^_^  

Happy February and until next time.............Hugs,
Regi


Friday, January 25, 2013

Gabie and Pumpkin...our new lil babies!!

Well....we just couldn't stand not having a furbaby in the house and for the first time we didn't get an adult cat that needed a loving home. Oh nooooo...we got KITTENS!! That's plural for more than one....yes you read that correct. There were four to choose from...we didn't get all four even though the Chazman wanted all four to live here.....we were chosen by two. Yes...I said chosen because I think the cat picks the human...not the other way around. ^_^  Two seemed very at home while roaming about on their visit so those are the ones that will be a part of our family. Just two days and they are already in our hearts. Meet Gabie and Pumpkin.


Gabie is the beautiful grey and of course Pumpkin is the gorgeous orange. They are such characters already at such a young age. (Born 12-18-12) Just like most sisters, they love to play and I do mean play. It seems they already have a favorite game of "Queen of the pillow".

Gabie says "I will rule this pillow"

Pumpkin using her ninja skills (foot to the face)

Gabie comes back with a ninja flip flop

Pumpkin telling Gabie "Sissie, it's my turn to be Queen"

Gabie told Pumpkin to go stand in the corner..ya don't argue with THE QUEEN


Gabie decides they should both be Queen and take a nap

Nothing like a sisters love

We are so enjoying these lil darlins. They both had baths today and you would have thought I was killing them. I figured they would hide from me when I finished but as soon as they were dry and I put them down they were playing with my toes and meowing at me. They are both going to be talkers. LOL  I'm hoping that I can catch Pumpkin on video when she eats because she does actually sound like she is talking. The Chazman and I both heard her today at breakfast. With every bit she took she would say Nommm nommmm nommmm in a whisper. I kid ya not...she did!!! 

Pumpkin loves to have her photo taken as you can see in this shot.


Gabie is going to be our shy little girl.


Hope ya'll don't mind but I will be showing ya more photo's as they grow into brilliant young ladies..HAHA 

Until next time........Hugs,
Regi

Monday, April 30, 2012

Salt Life for me!!!

It was a very interesting weekend and it was all due to living the Salt Life!!! Now that we live in a coastal town I can not imagine living any place else. So close to nature and all she has to offer. Mother Earth is amazing ^_^ Of course.....there are some man made times that get added into the mix as well. I mean...where else can you have a job and get to look out at an emerald green coast, smell the salt air and witness so many breathtaking things going on around you and know that as soon as your job is complete that you can walk down to the warm white sand and just sit and listen and watch!!

Saturday was nice....we only had one unit to clean and once finished we were going to go to the beach but the Hubbikins wanted to get home and see what in the world was going on with our old Betsy (that's our vehicle in case you are to young to know what that means..hehe) I won't go into detail because frankly my dears I have no clue as to what he did or what in the world Betsy is up to. That's his job!!  I pulled weeds in the flower beds that wrap around the house. I have some very interesting plants!!  Sunday's schedule had us down for cleaning two units and we decided that it had been long enough since we had gone to the beach and just sat and enjoyed it...so we did...after we cleaned the two units of course.

With it being a bit late in the afternoon after we finished cleaning, the beach we went to was not crowded at all. It wasn't just because of that but also that the water is still pretty dang cold. Not for the Chazman though and if he goes in then that means I go in. Brrrrrrrrrr.....I couldn't decide if my feet and legs actually got use to the water temp or if they just became numb from the cold. ^_^   The ocean was letting Chaz have a grand time as it rolled in and pushed him over (not under...just over and over he tumbled) This merboy loves the ocean. I do believe that his baby blues get even bluer with a hint of emerald in them when he is in her element. Several times he did get a bit choked up, coughing water out but that was only because he was giggling so much in all the fun he was having. While we were splashing and playing we looked up and to our surprise there were the Blue Angels flying overhead. We love going to the Pensacola Naval Museum where the angels are stationed at and to actually get to see this amazing squadron flying was awesome.


We thought our day was made by seeing them BUT Mother Earth/Ocean was not going to be outdone by any means. She decided to show us her flying squadron. Noooo...it wasn't fish jumping out of the water...HAHA...but a group of Manta rays catching the waves and coming close to shore. Have you ever seen a Manta ray? Beautiful dark angels gliding through the water or as the Chazman put it....giant water bats. It was AMAZING!! It was kinda eerie too that they showed up right after we saw the Blue Angels. The Angels fly in a team of six and we counted six Manta rays in the group. Makes you wonder, huh?  I can't believe that I didn't have my camera with me but I did find on youtube someone that did have a video camera handy on the day they saw some. (Manta Rays..click HERE)

See how great it is to live the Salt Life. Arrrggg me maties...I wouldn't a nare be a livin anywhere else.

Until next time...............Hugs,
Regi

Wednesday, December 21, 2011

Chaz the Wizard!!!

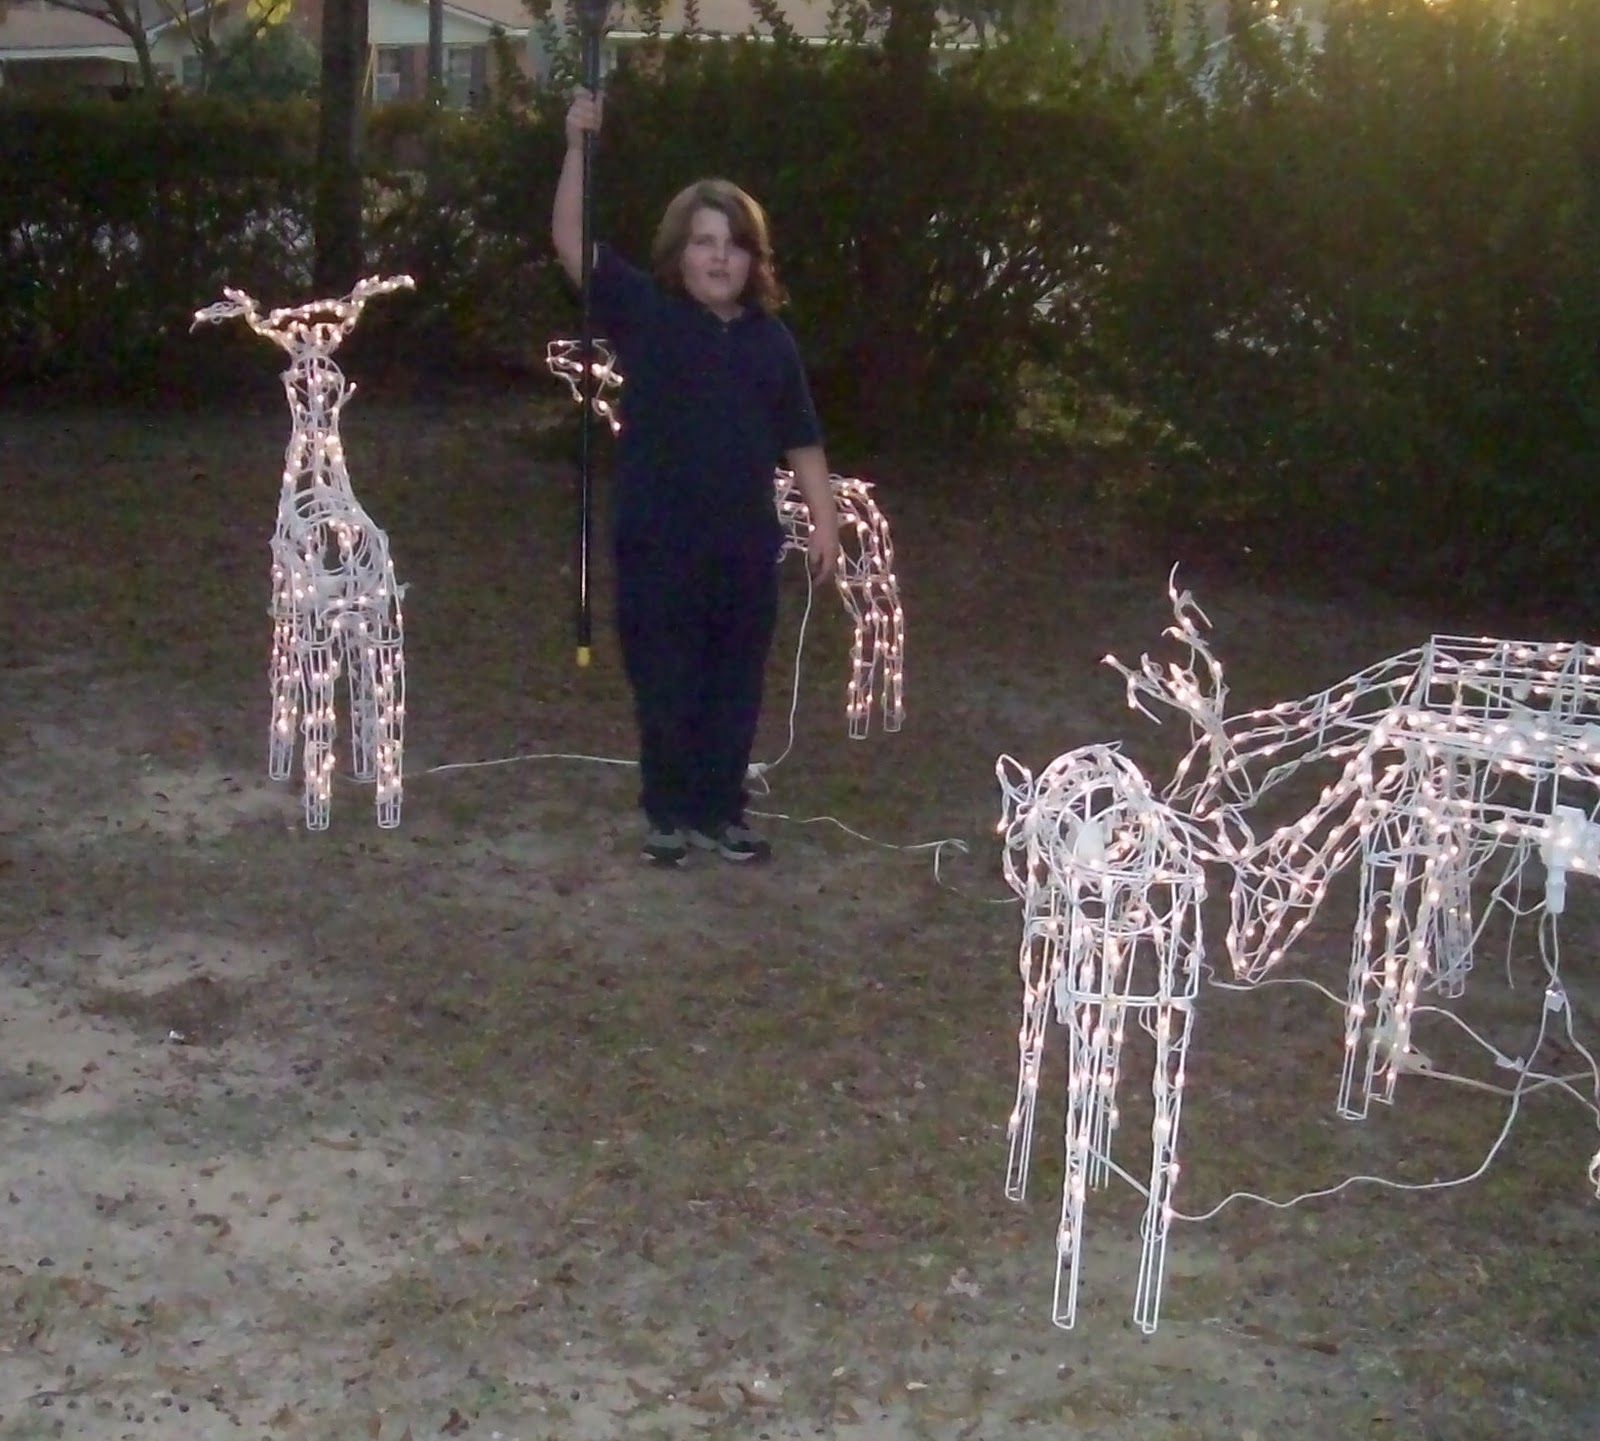
OMGOSH...I can't believe we pulled one over on our Chazman. Poor dear is as gullible as his momma. HaHa   I would have loved to have gotten this on video and of course at the time...arrrggg...my batteries were going low. (Something keeps draining the dang things.....I guess it's our little ghostly housemate) See if you can guess what we were able to pull over on him by these photos.


Oh the games we play....on our kiddos..hehe!!! Did you guess what was happening? Want me to tell you? No!!  Well, alrightie then....keep thinking. While you are thinking about what could be happening, here is what our cat thought about it.
Ms. Peaches would look at Chaz and the reindeer and then turn and look at us when my giggles turned into full out laughter. She was getting rather confuzzled I do believe. She finally walked over to me.
Meoooome...(that's what she calls me....really..it is) "Please tell me what's happening...I'm getting purrrrfectly confused over our human child's reactions out there". Have you guessed yet? Ready for me to tell you? It's really funny and we all laughed so hard over it....that is after the Chazman got over being very upset with us.  You see, his daddikins was standing in the door way and every time Chaz would take the broom and hit the ground he would either turn the light switch on or off...that made the lights on the reindeer either be ON or OFF.....ROFL!!! The reason the Chazman got so upset is because he thought that he was doing magic. It almost made me not want to tell him it wasn't him but I decided it might be best to go ahead and fess up. I mean he might try flying next and that could really turn out bad. Once he got over the angry/mad/upset/I can't believe you would do that to me stage..he giggled and then laughed.

A memory can be built on the smallest thing. When you get the chance to help that memory be one that will be long remembered....make it!!!

Until next time...........HUGS, Regi

Monday, December 5, 2011

Make it Monday

I'm decorating today...YEAH.....I just love to decorate for Christmas. Since I'm going to be rather busy today I thought this tutorial I did last year would make for a great repost today. It's a fun project and you can decorate these so many pretty ways. So..while I'm busy tearing up the house decorating....have some FUN!!!

I thought with it being that time of year when most of us think of sharing and giving (which by the way... I feel all year long ^_^) that I would share my resyculbinz way of making snowflakes. It's a fun project that I think anyone would enjoy doing. These snowflakes can be used in so many different ways to decorate for the Holidays. Make some up for your tree...or perhaps to attach to a winter wreath....or as a pretty tag to attach to a gift...or make several to put together as a banner. I know that you will find a way to let this fun and simple project work for YOU.  Let's get started:

Supplies you will need:  
Empty toilet tissue or Paper towel roll
Ruler
Pen or Pencil
Scissors
Glue
Clothes Pin
Fabric or Yarn
Buttons..Beads..Broach..Embellishments

For the snowflake that we are making today, we need 15 pieces. Take your empty paper holder and mark off every 1/2 inch. This will give 16...one extra to get you started on your next snowflake ^_^.

Once you have made all your marks, take the holder and mash it flat and keep your marks showing on top. Take your scissors and cut your strips where you have marked. Actually, you can make your strips be as narrow or as wide as you want them. I just like the 1/2 inch ones...but you can decide on what size you want on the next snowflake that you make.

Once you have cut up all your strips, this is what you should have.....a MESS...no no just kidding. You can see from the ones on the left that I have pulled apart a bit that they look a little like petals. That's what we want...perfect. You did a great job!!

Choose five of the petals that look about the same size. I say this because, some of us, even if we have our project marked, we still can't cut to straight. Ri iight? Ohhh please say I'm not the only one. It doesn't count if you have one of those nice paper cutters...that's cheating.

Once you have the five picked out then we need to glue them together. It doesn't take a lot of glue but I like to use one that is fairly fast bonding. Put a touch of glue on the end side of a petal and stick it to another petal. Attach the clothes pin to the two petals and let it sit for about 5-10 minutes. To speed the process you can do this with all five pieces at the same time...attaching each to the other. This will be the top part of our snowflake. Put it over to the side and let's do the bottom part now.


This is how the bottom part of the flake should look. Same process as the top, lay out five petals that are similar in size. Glue them together. Once it is dry then you are going to add the remaining five pieces. Place a petal in between the original petals. Glue those in place and let dry.

This is what you should have now that both the bottom and the top of the snowflake is dry. Wasn't that FUN?

Now is when you decide what you want your snowflake wrapped in. You can use yarn...there are so many wonderful kinds...wool yarns....sparkling yarns....twisted yarn...I think you know what I mean. You can also use fabric. Which is what we are using today. A white cotton fabric. Now remember this project is from my Resyculbinz file...which means I love to use recycled items. You know that the paper holder fits that category but your fabric can too. Old shirts...old sheets....old pillow cases, which is what I used for this project. Take your fabric and cut just enough down to be able to tear it. The snowflakes look great with a few of the fringes that tearing the fabric leave. I made strips measuring about 1 inch wide. I tear a few to start with and then do more as I need them. We all wrap differently so I think this is the best way not to tear to many.
To start your wrapping all you need to do is wrap your fabric around the center. I place the end at the back of the flake, wrap it over the front and then back under coming out to one of the petals. Now you simply start wrapping each petal.

 It makes for a neater wrap at the tips of the petals if you twist the fabric once and then wrap down the other side. Continue this step until all of the snowflake is wrapped. Once the top part of the flake is complete put it aside and do the bottom piece the same way. When both pieces are complete, lay the smaller flake on top of the larger flake and you can either wrap a few of the petals together that are touching each other. Or you can put a few stitches to hold them together.

Now is the best part...well..I think so but you know how I love to embellish!! You can put a pretty pin in the middle....perhaps sew some beads on the tips or leave plain. Remember that each and every snowflake that is created by nature is a true one of a kind.

I hope you enjoyed this snowflake project. I would love to see your photos if you do try it. There are so many things that you can do with this basic idea.  Enjoy..have fun!!!

Just to show that you can do more than snowflakes with this project. What do you see if you add even more petals to the basic bottom pattern? Let me give you a hint.....picture the center 10 pieces of this done in red and then the outer 10 pieces done in greens. A Pointisetta!!

Until next time.....Hugs,
Regi