Happy Happy Sunday peoples. I hope that's it's a beautiful morning for you all. I know it is for me because I woke up. ^_^ That's always a good thing, yes? Matter of fact I woke up at 4ish and have been doing that a good bit here lately. It's hard for a night owl to suddenly want to be an early bird too. Confusing...very confusing indeed!!
To continue with the beach theme decoration projects that I started yesterday I thought with it being Sunday that my shell cross would be the perfect one to share.

Pretty yes? I stated yesterday that I'm making these beach themed projects where they can be enjoyed year round but YOU can always add any embellishment you like to make it be for that one special holiday. These would also make great gifts to give to that special friend that loves everything beachy. What could be more perfect as a gift....one made by you from gifts that Mother Nature donated.
I do my projects as what I teasingly call "The Starving artist way" because I try to repurpose items in doing them. You can of course change out the repurposed items for other items you may want to use. That can be a good thing for some....a chance to go to Hobby Lobby or Michaels. YEA!!! I have to be very, very careful when going there because if the mister EVER finds out what I actually pay for supplies I do buy....well...there's going to be some trouble. HEHE!! Now, what were we talking bout...oh yes...here's what you'll need to get started with this very simple project.


 Once you have the printed cardstock glued onto the cardboard then you're ready for the next step. Let's put the twine hanger on. Doing it now makes it so much easier then later...believe me....trial and error peoples, learn from my errors. Poke two holes in the top of the cross base and then run your twine through each hole and bringing them through to the front of base. Tie at least two knots and then hot glue it down to the board. This gives it added strength. (If you are using the wooden base then make sure you buy one of the frame hanging kits so you have a way to hang up when completed and do add it before adding any shells. Don't want to crack any of those lil beauties)
 Next we are going to place the shells on the cross base so that we will know exactly how to space them before gluing them on permanently. Makes things so so sooo much easier. Once you have them spaced the way you want them then it's time to start making some marking lines.
 Marking lines make sure that you glue shells where they need to be. It's a bit time consuming but well worth the extra effort in making sure your cross looks uniform. Simply lay your shells over to the side as close to how you had them on the cross and picking each one back up place on cross and mark where your glue line needs to be. You will put glue there as well as a small dab on the inside top of shell to attach to other shell before it. (The first shell will simply be attached to the cross tips. Yes...start at the top and work your way down until you come to the middle. Turn cross and do the same for the other three sides...meeting in the middle.)
 Here's what the middle will look like once you have all sides of the cross complete. Take four smaller scallops and glue them as shown in picture. Then take a shell large enough to cover hole and glue that to the four shells. Add a smaller shell on top of that and your cross is complete. This is where you could add embellishments if you desired. I love it just the way it is, so that I can hang it year round.
I hope you will take some of your scallop shells found on those beach walks and make a cross for a friend or even for yourself. Of course, you can use whatever shells you like, just play around with them. Have FUN!!
Until next time...........Blessings,
Regi
Tomorrow we're going to make a oyster shell angel. Come back and learn how. ^_^
To continue with the beach theme decoration projects that I started yesterday I thought with it being Sunday that my shell cross would be the perfect one to share.
Pretty yes? I stated yesterday that I'm making these beach themed projects where they can be enjoyed year round but YOU can always add any embellishment you like to make it be for that one special holiday. These would also make great gifts to give to that special friend that loves everything beachy. What could be more perfect as a gift....one made by you from gifts that Mother Nature donated.
I do my projects as what I teasingly call "The Starving artist way" because I try to repurpose items in doing them. You can of course change out the repurposed items for other items you may want to use. That can be a good thing for some....a chance to go to Hobby Lobby or Michaels. YEA!!! I have to be very, very careful when going there because if the mister EVER finds out what I actually pay for supplies I do buy....well...there's going to be some trouble. HEHE!! Now, what were we talking bout...oh yes...here's what you'll need to get started with this very simple project.
28 Scallop shells
Piece of heavy cardboard
Piece of printed cardstock
Hot glue gun and glue sticks
School glue stick
Scissors
Twine
Ruler
Pencil
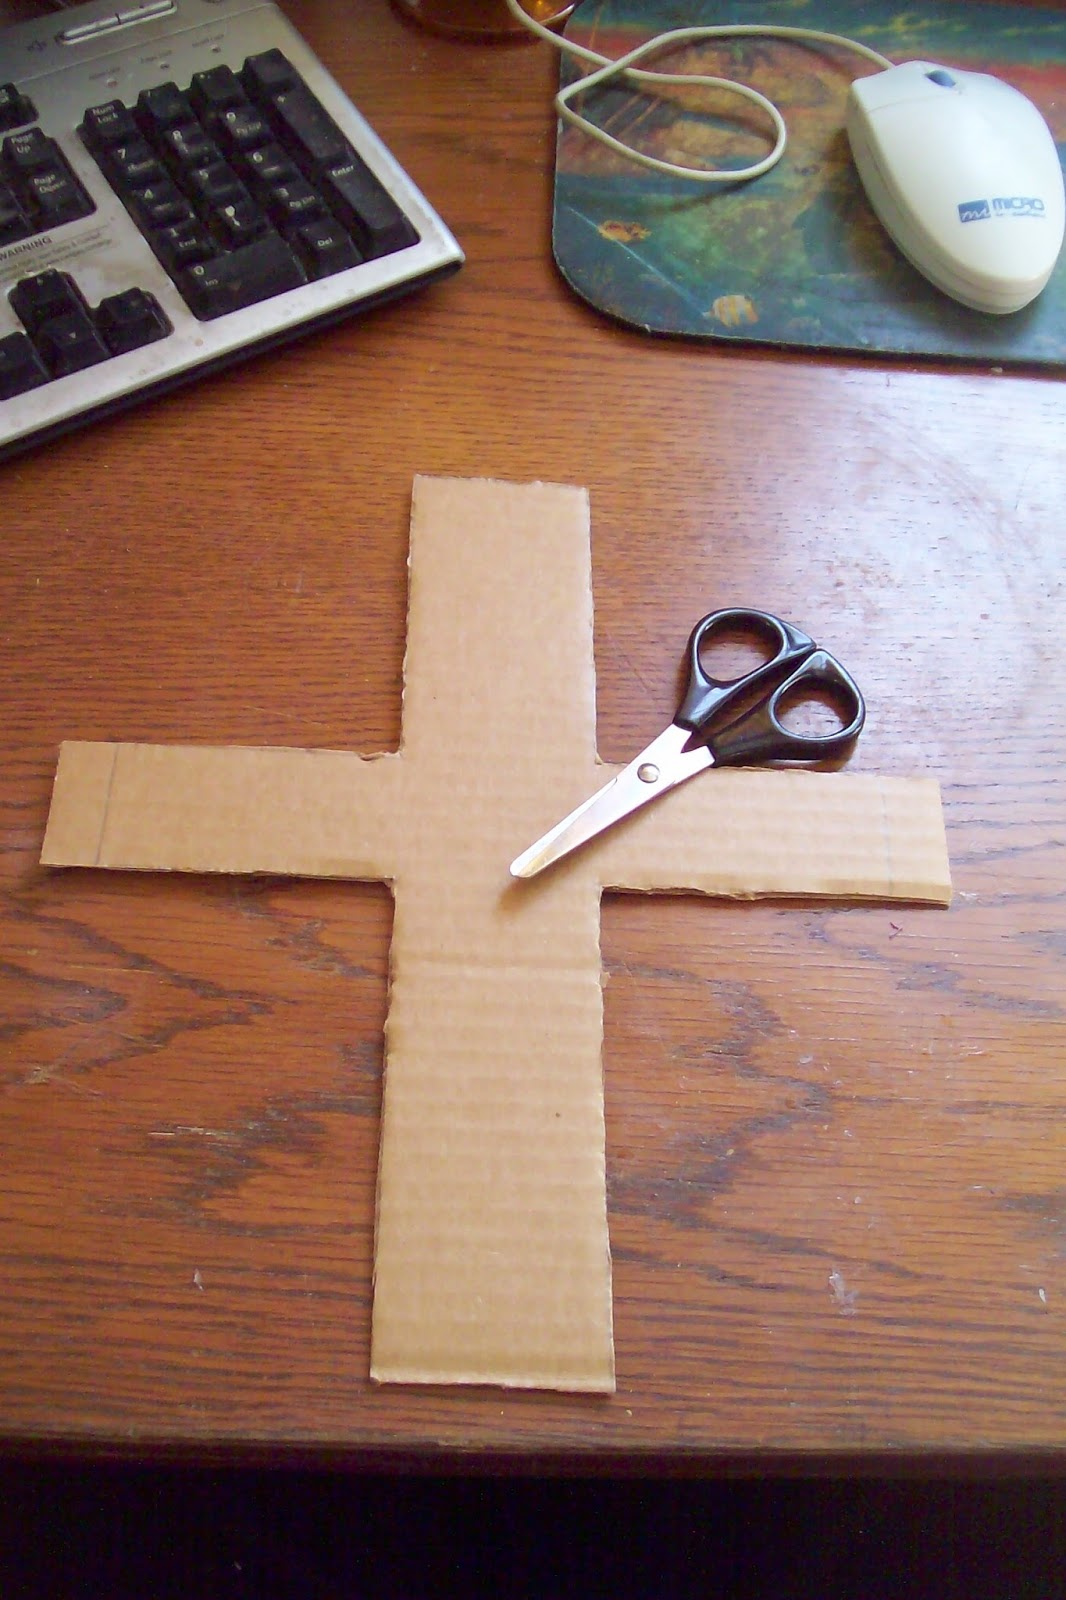
My cross measures 10 1/2 inch by 8 1/2 inch and is about 1 1/2 inch wide. You can of course make yours as big or as small as you like just keep in mind the size of shells that you are using cause you don't want the cardboard peeking out. This is also where a trip to a craft store could happen peoples if ya don't want to do it the starving artist way. (ie...buying an unpainted wooden cross) Take your piece of cardboard, ruler and pencil and draw your cross onto the cardboard. Then cut it out.
My pretty piece of printed cardstock that will be my backing. This piece is embossed so it will give the cross base even more strength to hold the shells. (If you chose to use the wooden base then leave it natural or cover with a piece of felt.)
Now there are two ways you can do this next step. You can lay the cardboard cross down and trace around the edges onto the back of the printed cardstock, cut it out and then glue it on OR to make sure it's a perfect fit (for those of us that can't seem to trace or cut a straight line) simply glue the cardboard cross to the whole piece, wait for it to dry and then cut around the edges. HEY...I like to give several different ways to work peoples. I use the glue stick to do this as hot glue can make it a bit bumpy underneath.
I hope you will take some of your scallop shells found on those beach walks and make a cross for a friend or even for yourself. Of course, you can use whatever shells you like, just play around with them. Have FUN!!
Until next time...........Blessings,
Regi
Tomorrow we're going to make a oyster shell angel. Come back and learn how. ^_^
Honestly, I never would have thought to do this. Highly UNIQUE, Regi.
ReplyDelete