I made these cute Li'l Mummies last year for the Chazman's school Halloween party and they were a BIG HIT!! I thought that I would reshare with ya'll on how to make some for your kiddo's party this year. Make these and they will be screaming "I LOVE MY MUMMY" ummm I mean mommy ^_^
 Isn't he a cutie? Soooo simply to make and I'm going to prove it to you. By request of a friend (one that doesn't want to be named...I think she plans on making them and wants her child to think she did it all on her own...LOL...I don't mind...I love to share) I'm going to do a tut for you. OMGOSH...a tut....on a mummy....get it???? Tut...Mummy.....King Tut!! OK so I'm quirky...ya knew that already...let's get started.
 Here are the supplies you will need. Most you may have on your
 messy desk already. You will need.......


Card stock paper
Pencil
Fine point marker
Watercolor pencils (small brush) or crayons
Scissors
Crepe Paper (or creepy paper as the Chazman calls it)
Toilet Tissue holder
Assortment of Candy
Now.......... if you aren't one to save those empty toilet tissue holders (GASP...I can't believe that everyone doesn't) then no worries. You can make some using your card stock paper. A toilet tissue holder is a tad over 4 inches long...that makes a good mummy body....so here's what you do..

If you do have ONE toilet tissue holder then place it on your cardstock paper and mark the length or if not then take a ruler and mark off 4 inches.

Cut your paper and then roll around the empty holder or if no holder then just roll up until you think it looks like a toilet tissue holder. Imaginations people...imaginations!!! ^_^ You can tape the seams or glue them. Me personally...I would tape them...much faster!!!

Since this is a "Trick or Treat...Smell my Feet" mummy then we need some stinky feet. I like to do one original pattern on cardboard (that way I can keep it for future use) and just trace the outline and fill it in where I need to. This is if you are doing several of something...which I am in this case.....24 to be exact. You are more than welcome to copy and save my pattern and use if you like. Remember..I like to share!! To make your original pattern, take your holder and place it on the paper and trace around the bottom. Then simply add some toes. Also, something I did a bit different with my original pattern this time was to add three tabs to it. Add one at the back and two at the sides so that you can glue or tape them to the roll a whole lot easier. Repetition sure does make you readjust things..hehe I go over my pencil tracings with a fine point marker. Then I use my watercolor pencils to add some "age" around the toenails. For the eyes I just do a bubble (make sure you measure on the holder how big you need to make the bubble) and then draw my eyes inside it. I use my watercolor pencils to add some color to them. Crayons will work just as well for this...especially if little hands are helping you.

After you have cut out the feet and bubble face....you place the feet on the holder. I like to add a small piece of paper under the feet inside the holder to give it some support for when you add the candy. Don't let it come out on the side with the toes...there will be enough support for that side. I then take a piece of the crepe paper and glue it across the feet and up the sides of the holder. Turn over and glue on your bubble eyes.

I know everyone has their way of doing things but I always like to give the right way suggestions and tips that I have come across. Do not open the crepe paper...I mean...yes you have to open it but do not take the wrapper off of it. It is easier to use if you cut the center and pull the paper out like a tissue box. I pull about 3 arm lengths out when making one mummy...seems like a lot but wrapping a body takes some paper. Even the small bodies..^_^ Also, if you don't just happen to have any laying around, I found mine at Wal-Mart in the party section for .97 If you have a Dollar Tree close by you can get a double pack for $1...even better!!

Now back to mummy. Take the end of your long piece of crepe and fold into a triangle and put glue on it. Place just inside the holder off to the side.

Now place the candy inside the holder. I put about 4 different kinds inside...it's really all up to you but you don't want it to heavy. Once the candy is inside then you take the crepe paper and wrap it twice around the openings...start the wrapping at the bottom and going up the other side to the top and back over. You can pick up the mummy while doing this but sit it back down once you have it started so that you can tighten the paper some around it. Be gentle!!

Once you have wrapped the openings then you can start to wrap the body. I wrap one time all around the holder with the crepe paper flat. You will have to twist the paper near the eyes. We don't want to cover up his eyes...now do we? Once you have wrapped the body completely then you will take the crepe paper and fold it in half and start to wrap it again. The folding makes it look more like mummy wrappings. Keep wrapping until you get to a small tail that will hang over the top of the mummy.

Take some glue and apply to the top and then press the tail over and let it hang down the side. I like to cut it and make it look like old strips of wrapping.

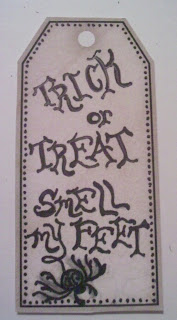
Mummy should look like this...or close to it. Now he would be great to give like this but the Chazman wanted a tag with the saying "Trick or Treat...Smell my Feet" on him. So I sat down and drew out a tag...a simple one and you are more than welcome (AGAIN) to copy and use mine. I ran mine through my printer so it is two sided. One side with the saying and one side with the cute scrapbook Halloween paper print. (the one behind the finished mummy pic) I also aged the tag..well..it is going on a mummy!! I just tied it around the mummy and it's that simple.

Don't ya think it's an easy project? Ok ok...maybe if you copy and paste and take all my babblings out then it would be but I just have to babble.
New note: The Chazman said that some of the kiddos didn't want to tear it open to get to the candy last year. They wanted to keep their Li'l Mummies....Ahhhh..made my heart swell ^_^. I'm thinking that this year I will make just a circle for the top....make sure it has a long flap piece on one side to glue to the roll. Wrap it in some crepe paper by itself before attaching to the roll. Once mummy is all wrapped...take and poke a hole in the top piece on the opposite side of the head and the top of the mummy and pull some twine through and make a bow. That way they can flip the mummy's top, eat their candy and keep their mummy intact. I have "GULP" twenty-five (25) Li'l mummies to make this year. I'm happy to do it because I know there will be a time coming (soon) that the Chazman will think he is too big formummy mommy to make things for him to take to school!!!
Even newer note: It seems the Chazman does NOT think he is too old just yet for mummies to be made to give to his classmates this year. I told him (very excitedly) that I would love to make some and how many did I need to make. He said "Ohhhh only about 35". Good Golly Miss Molly...today is September 25th (2013) so I had better get started.
Until next time.........HUGS,
Regi
New note: The Chazman said that some of the kiddos didn't want to tear it open to get to the candy last year. They wanted to keep their Li'l Mummies....Ahhhh..made my heart swell ^_^. I'm thinking that this year I will make just a circle for the top....make sure it has a long flap piece on one side to glue to the roll. Wrap it in some crepe paper by itself before attaching to the roll. Once mummy is all wrapped...take and poke a hole in the top piece on the opposite side of the head and the top of the mummy and pull some twine through and make a bow. That way they can flip the mummy's top, eat their candy and keep their mummy intact. I have "GULP" twenty-five (25) Li'l mummies to make this year. I'm happy to do it because I know there will be a time coming (soon) that the Chazman will think he is too big for
Even newer note: It seems the Chazman does NOT think he is too old just yet for mummies to be made to give to his classmates this year. I told him (very excitedly) that I would love to make some and how many did I need to make. He said "Ohhhh only about 35". Good Golly Miss Molly...today is September 25th (2013) so I had better get started.
Until next time.........HUGS,
Regi
How clever! I know the kids loved it.
ReplyDeleteI remember these from last year! And you are SOOO right that soon he'll be too old to let you make things for him to bring! My 13 year old just announced that he doesn't want me to come to "Muffins and Moms" at his school (I know it's because I always cry....) but still!
ReplyDeleteI miss you friend- but I am sloowwwly coming back to blogland- I promise!
xx
Stephanie
great blog and i enjoyed reading it..you have shared a wonderful tips and ideas on what is the better way to do..its so informative and helpful to all of us
ReplyDeleteGood golly, Ms. Molly, but YES, you should definitely get started. I remember these from last year and thought they were adorable! Get to workin' missy!
ReplyDelete